
Layout & Design Planning
How the 4-board tabletop layout was chosen — final size, which boards go where, and how to lock in those decisions so nothing flips during glue-up.
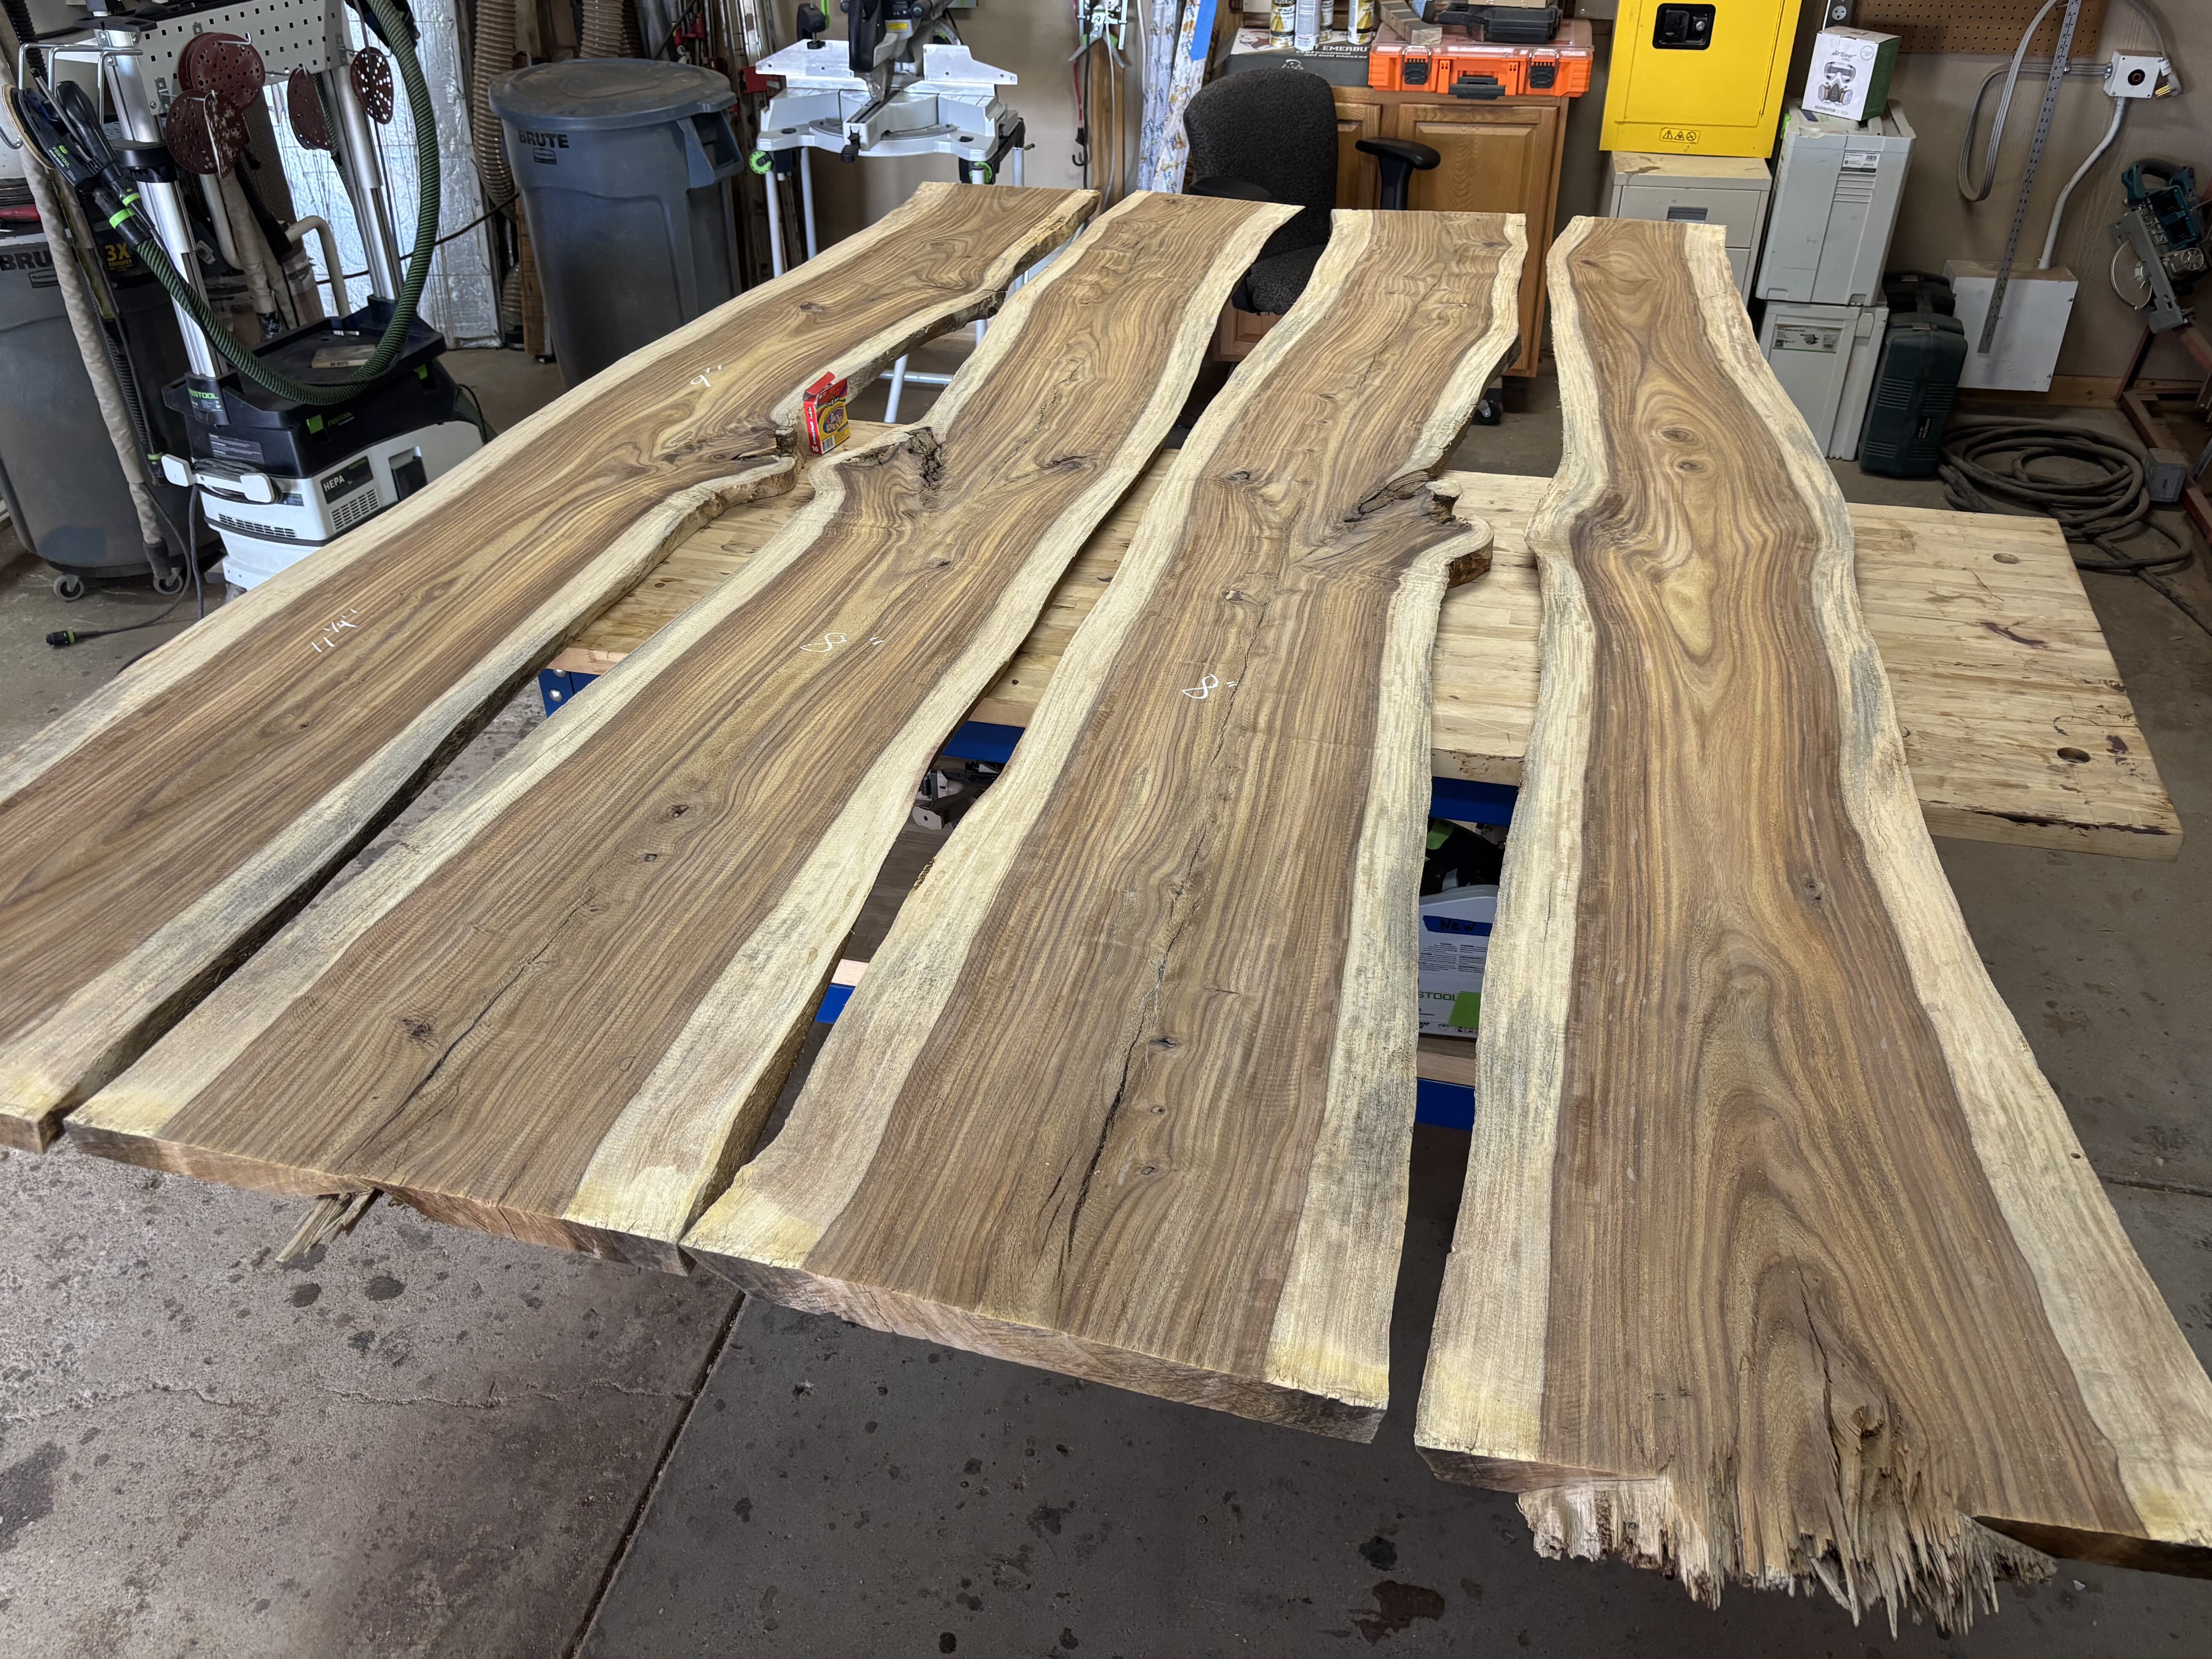
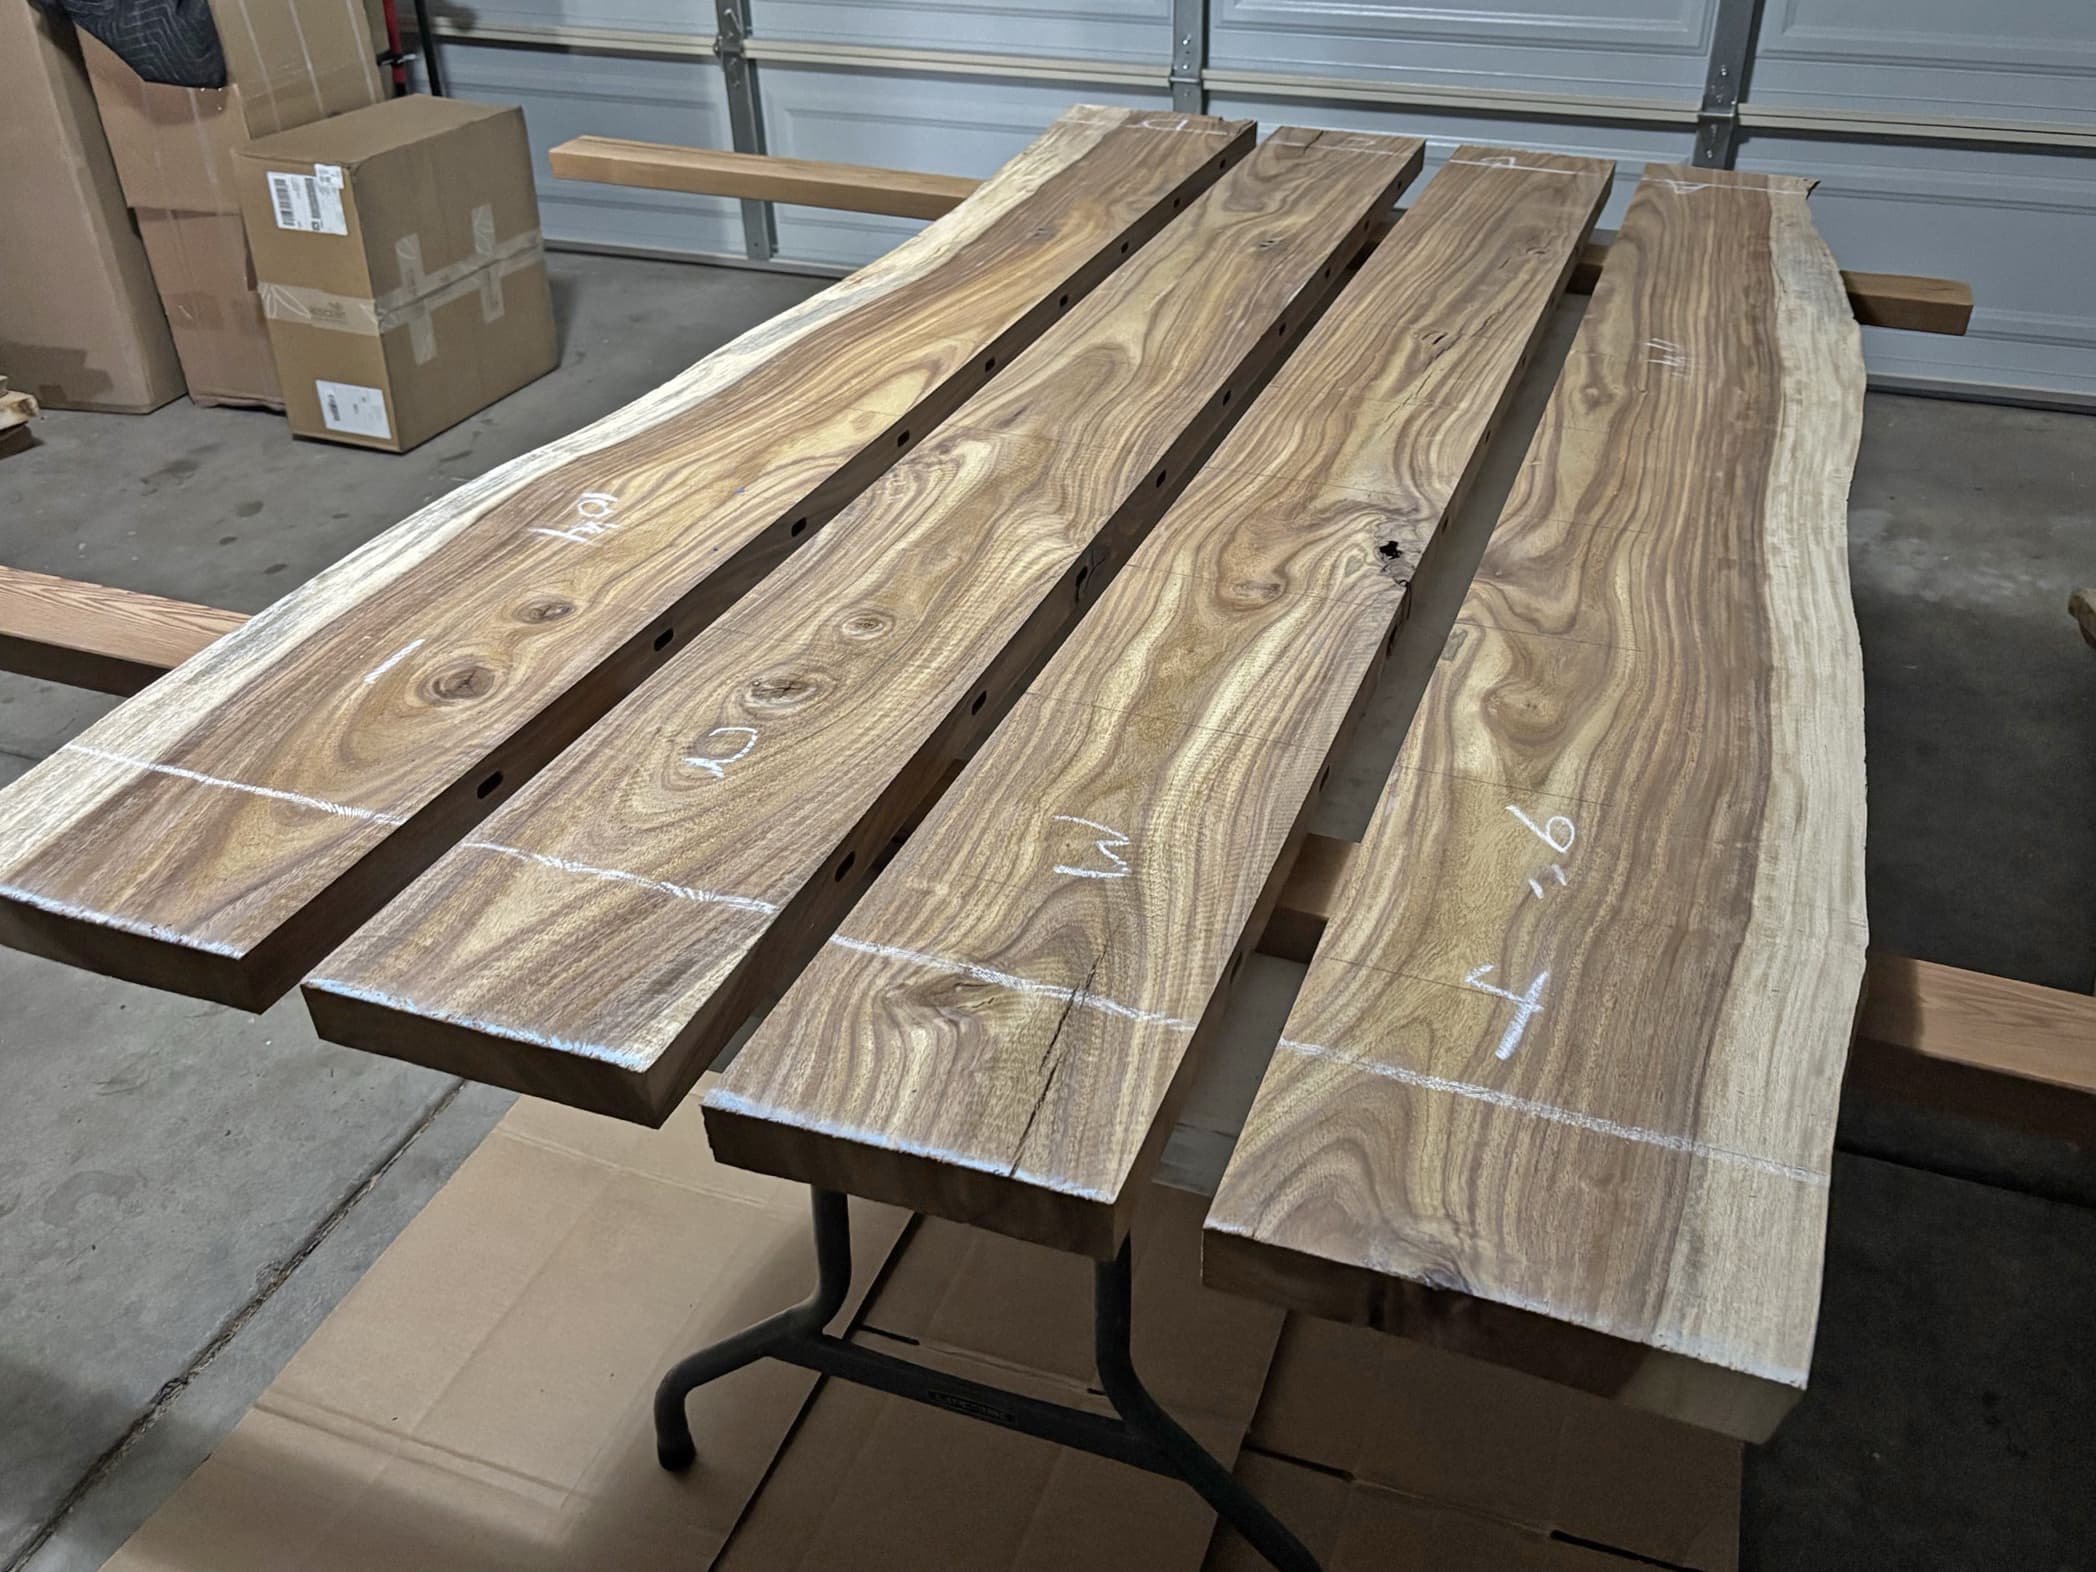
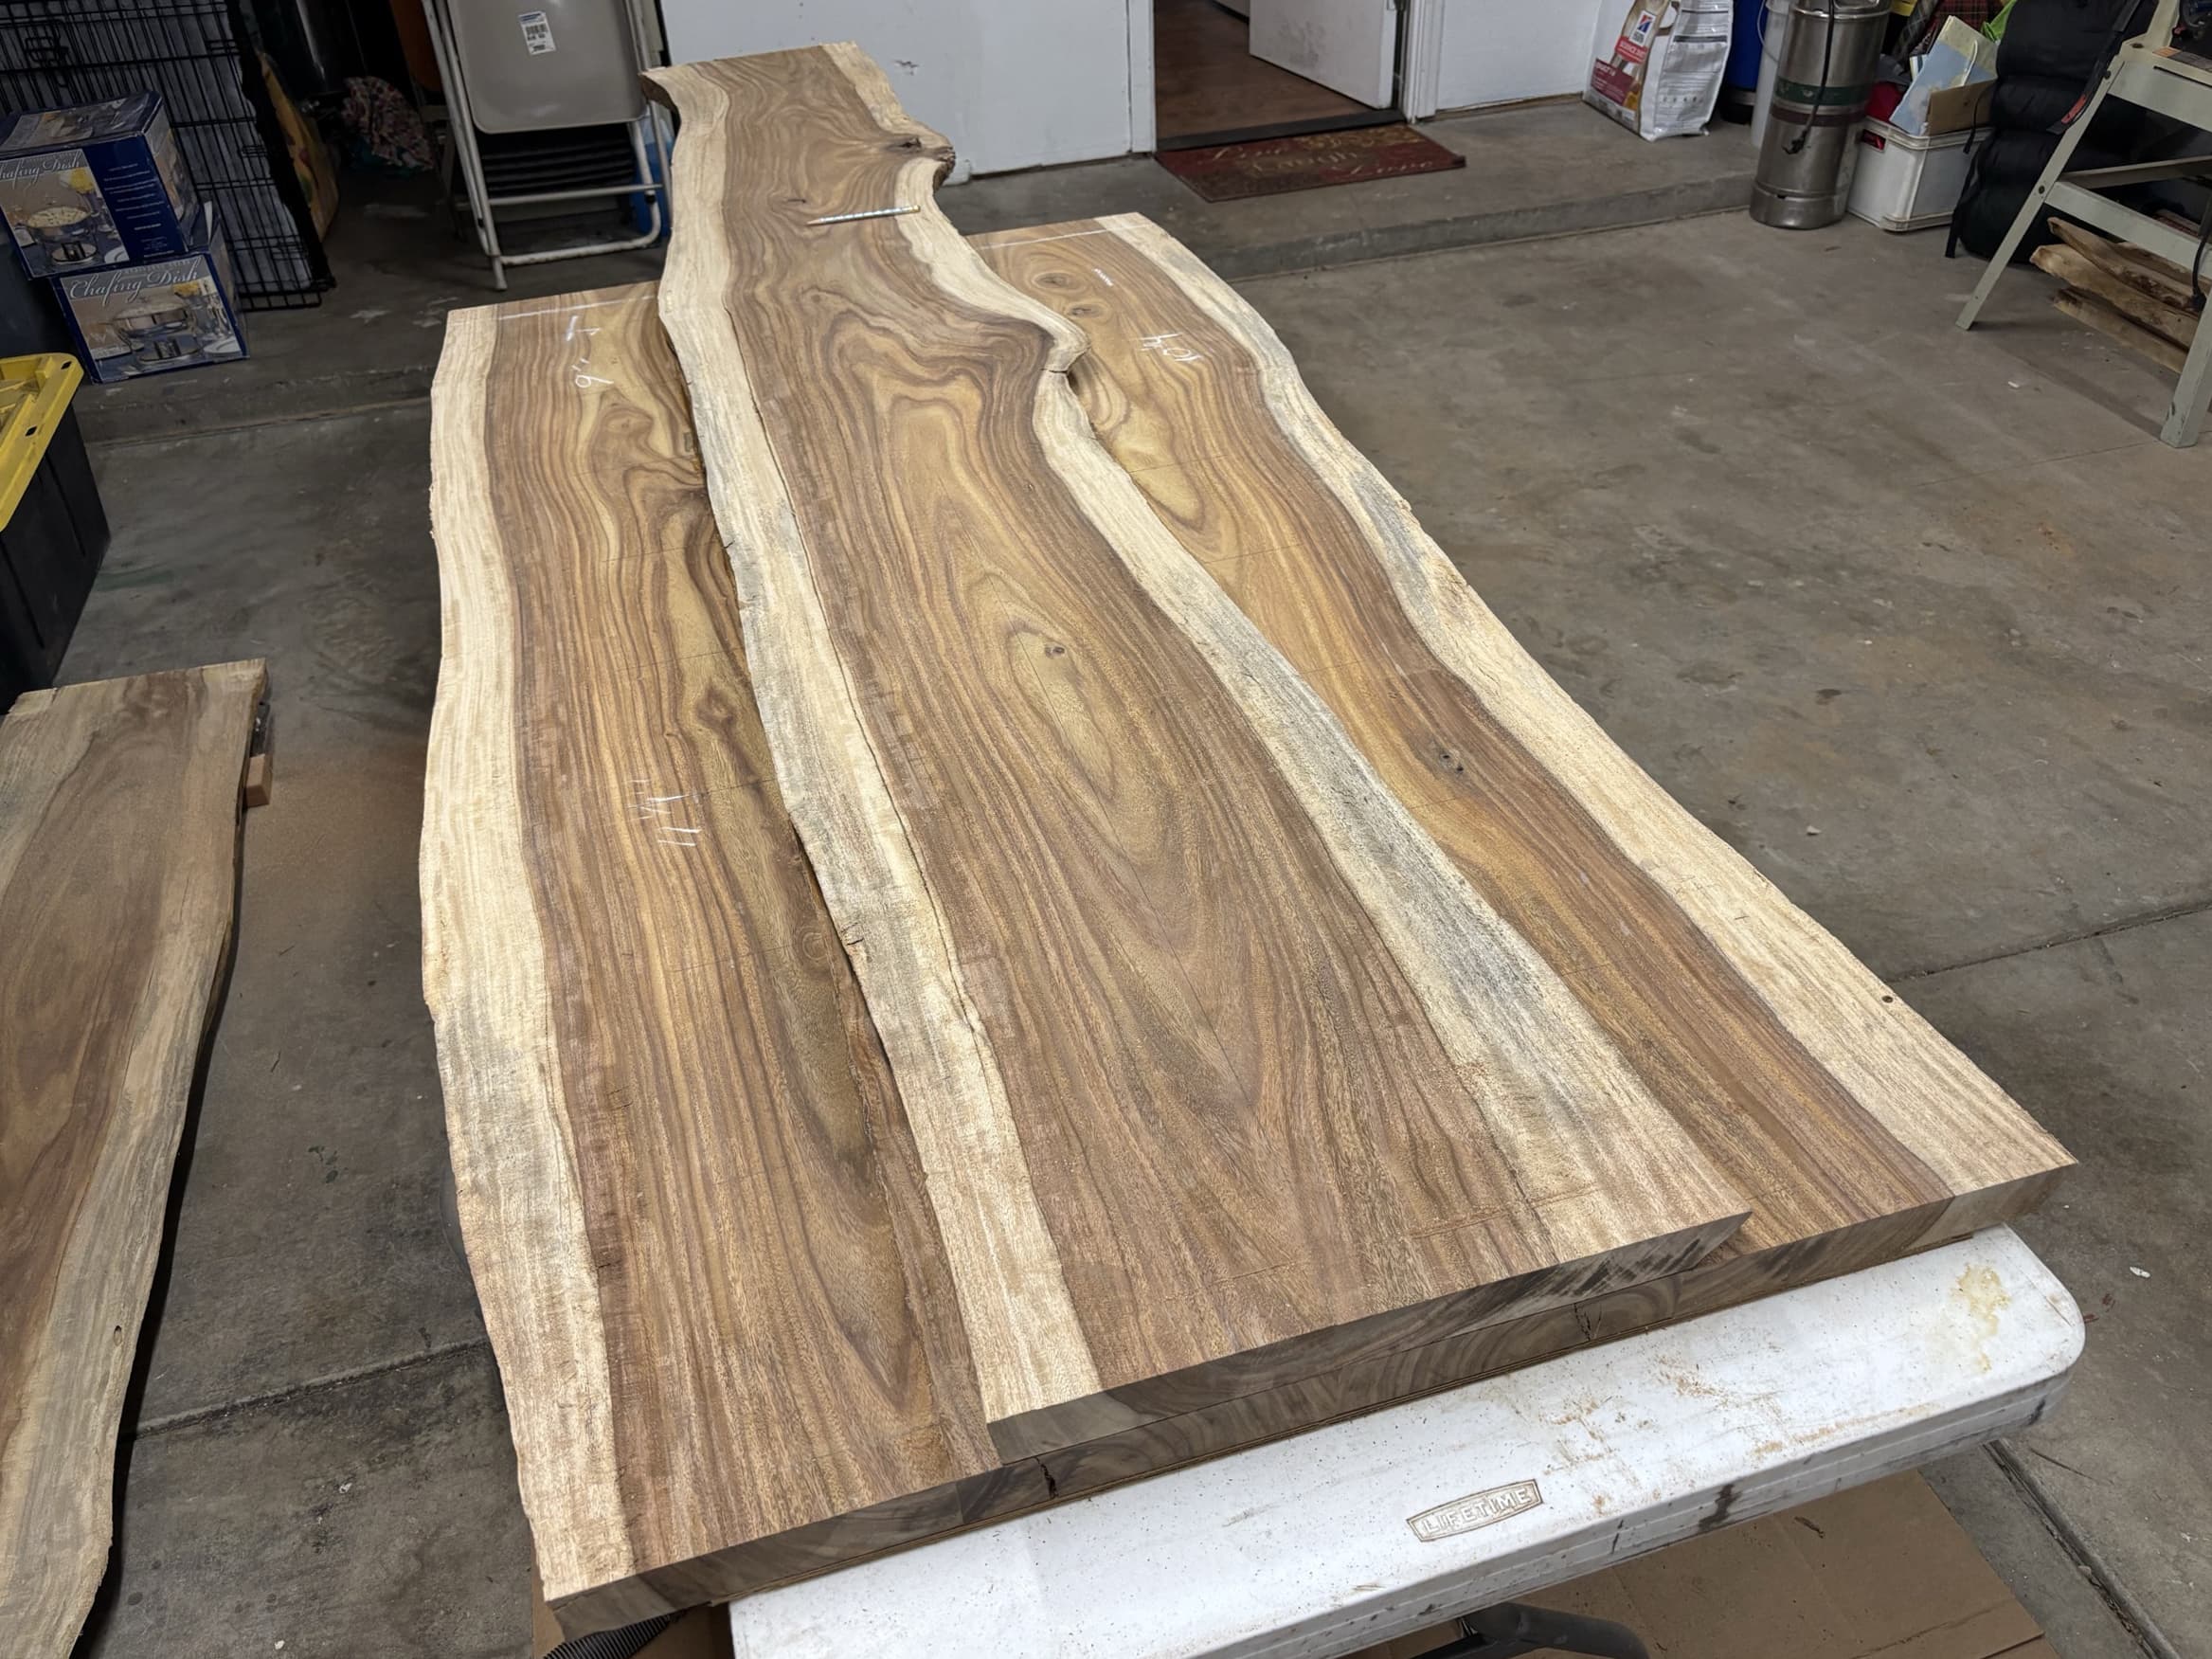
Final table size
- Length: approx. 71"
- Width: approx. 34–38", varying with the live edges
- Height: 32" (standard dining height, set by the steel base)
71" comfortably seats four chairs plus a bench. The width is deliberately a range — live edges aren't straight, and forcing them straight would defeat the point.
Selecting the boards
The tabletop is a 4-board glue-up: two outer boards carrying the live sapwood edges on the outside long edges, and two inner heartwood-only boards. Pick the outer boards for their live edges first, then choose inner boards that flow with them in color and grain direction.
Lesson learned: choose an even number of boards. An even count lets you balance the grain symmetrically across the top — the flow reads equally from both long edges instead of drifting to one side.
The 4-board arrangement
Two outer boards carry the live sapwood edges on the outside long edges; two heartwood-only boards sit between them. This frames the table in pale sapwood and fills the center with rich heartwood — a balanced, intentional look rather than a random panel.
Grain direction & visual balance
Lay the candidates side by side and read the whole panel, not individual planks. You want visual flow across the joints: grain that moves in a related direction and color that transitions rather than clashes. Plan where the live edges land before any cutting, and decide which face is the top now — the better-looking, more stable face goes up.
One deliberate choice that paid off: the boards were left longer than final length on purpose. The extra length gave room to slide and rotate boards while hunting for the best grain match, then trim to size once the arrangement was locked.
Lock in the decision
Once the arrangement looks right, mark it so it can't be lost. A big pencil triangle ("witness mark") drawn across all four boards instantly shows correct order and orientation — if the triangle doesn't line up, a board is flipped or out of place. I backed that up with letters and registration marks at each board-to-board joint, so every board had an unambiguous neighbor and orientation. Belt and suspenders, but it takes all the guesswork out of glue-up.
🛠 Tips
- Photograph layout options from directly above before deciding.
- Mark everything clearly — board order, top face, and edge pairings.
- Use painter's tape and pencil references you can't accidentally erase.
- Avoid accidentally flipping boards during glue-up — that's what witness marks prevent.