
Metal Legs / Base Planning
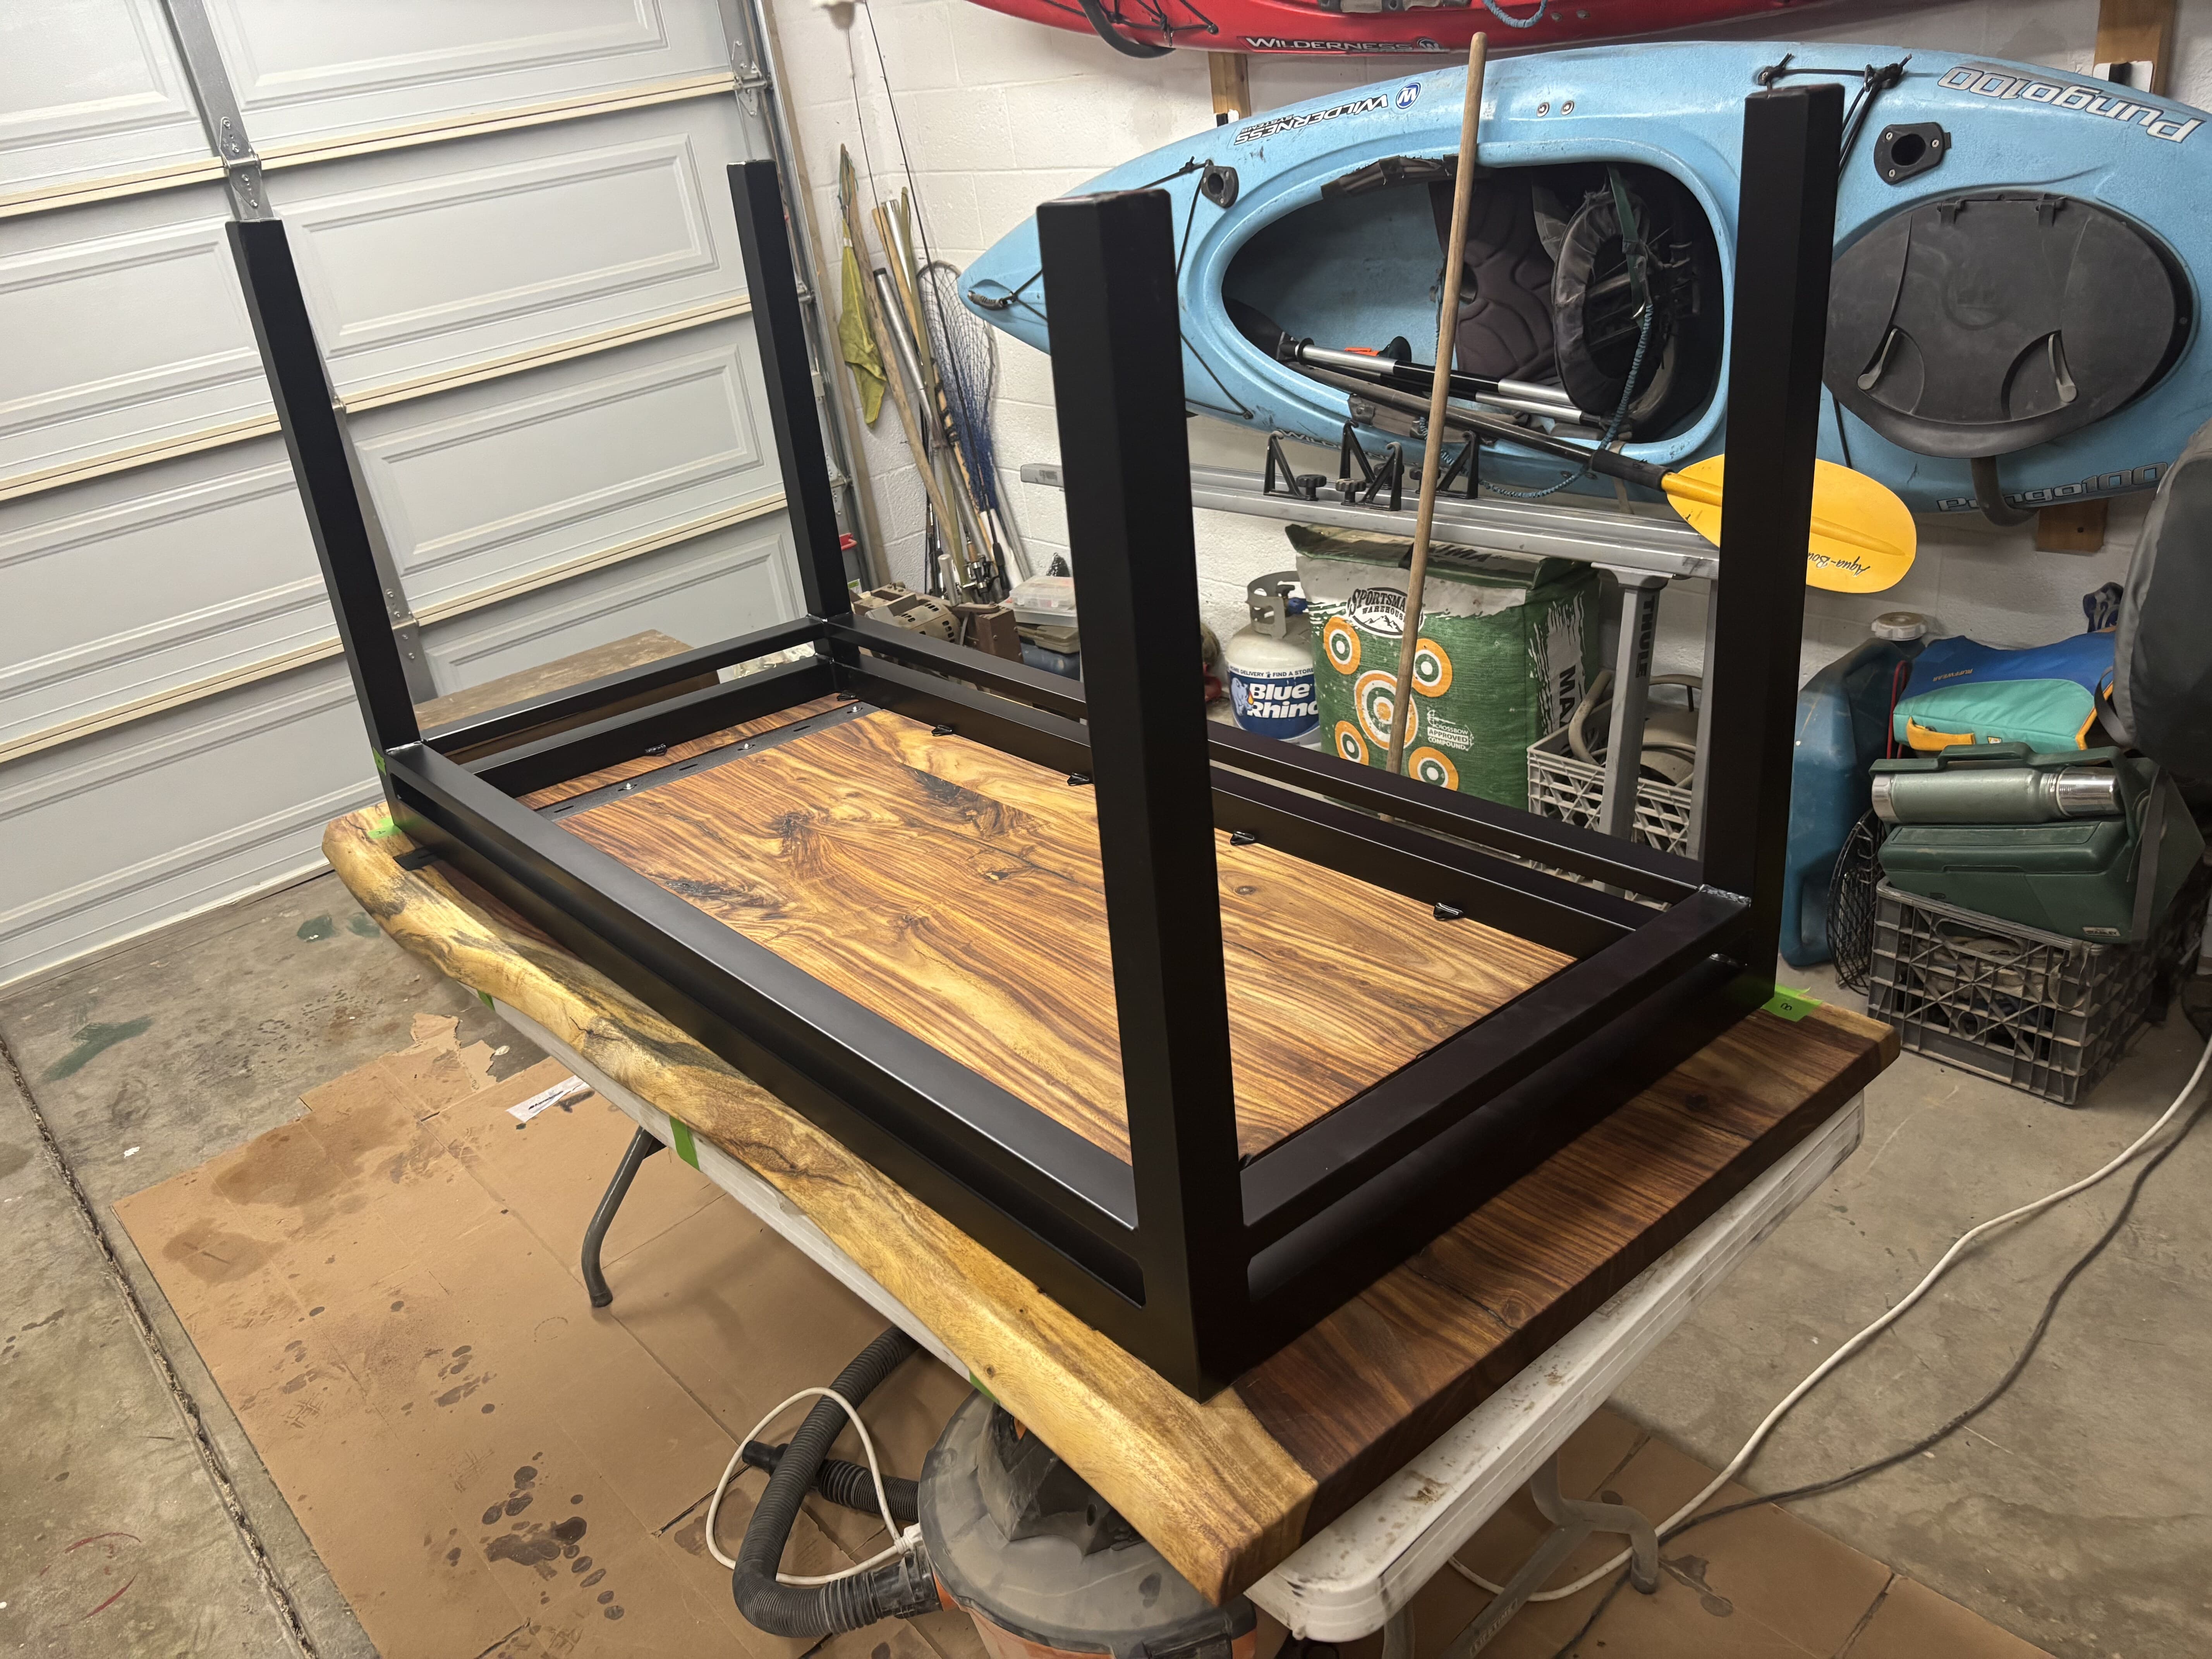
The matte-black steel base — a clean rectangular frame that complements the rosewood and black epoxy. This step is about the concept, spacing, and how it mounts; fabrication is handled separately.
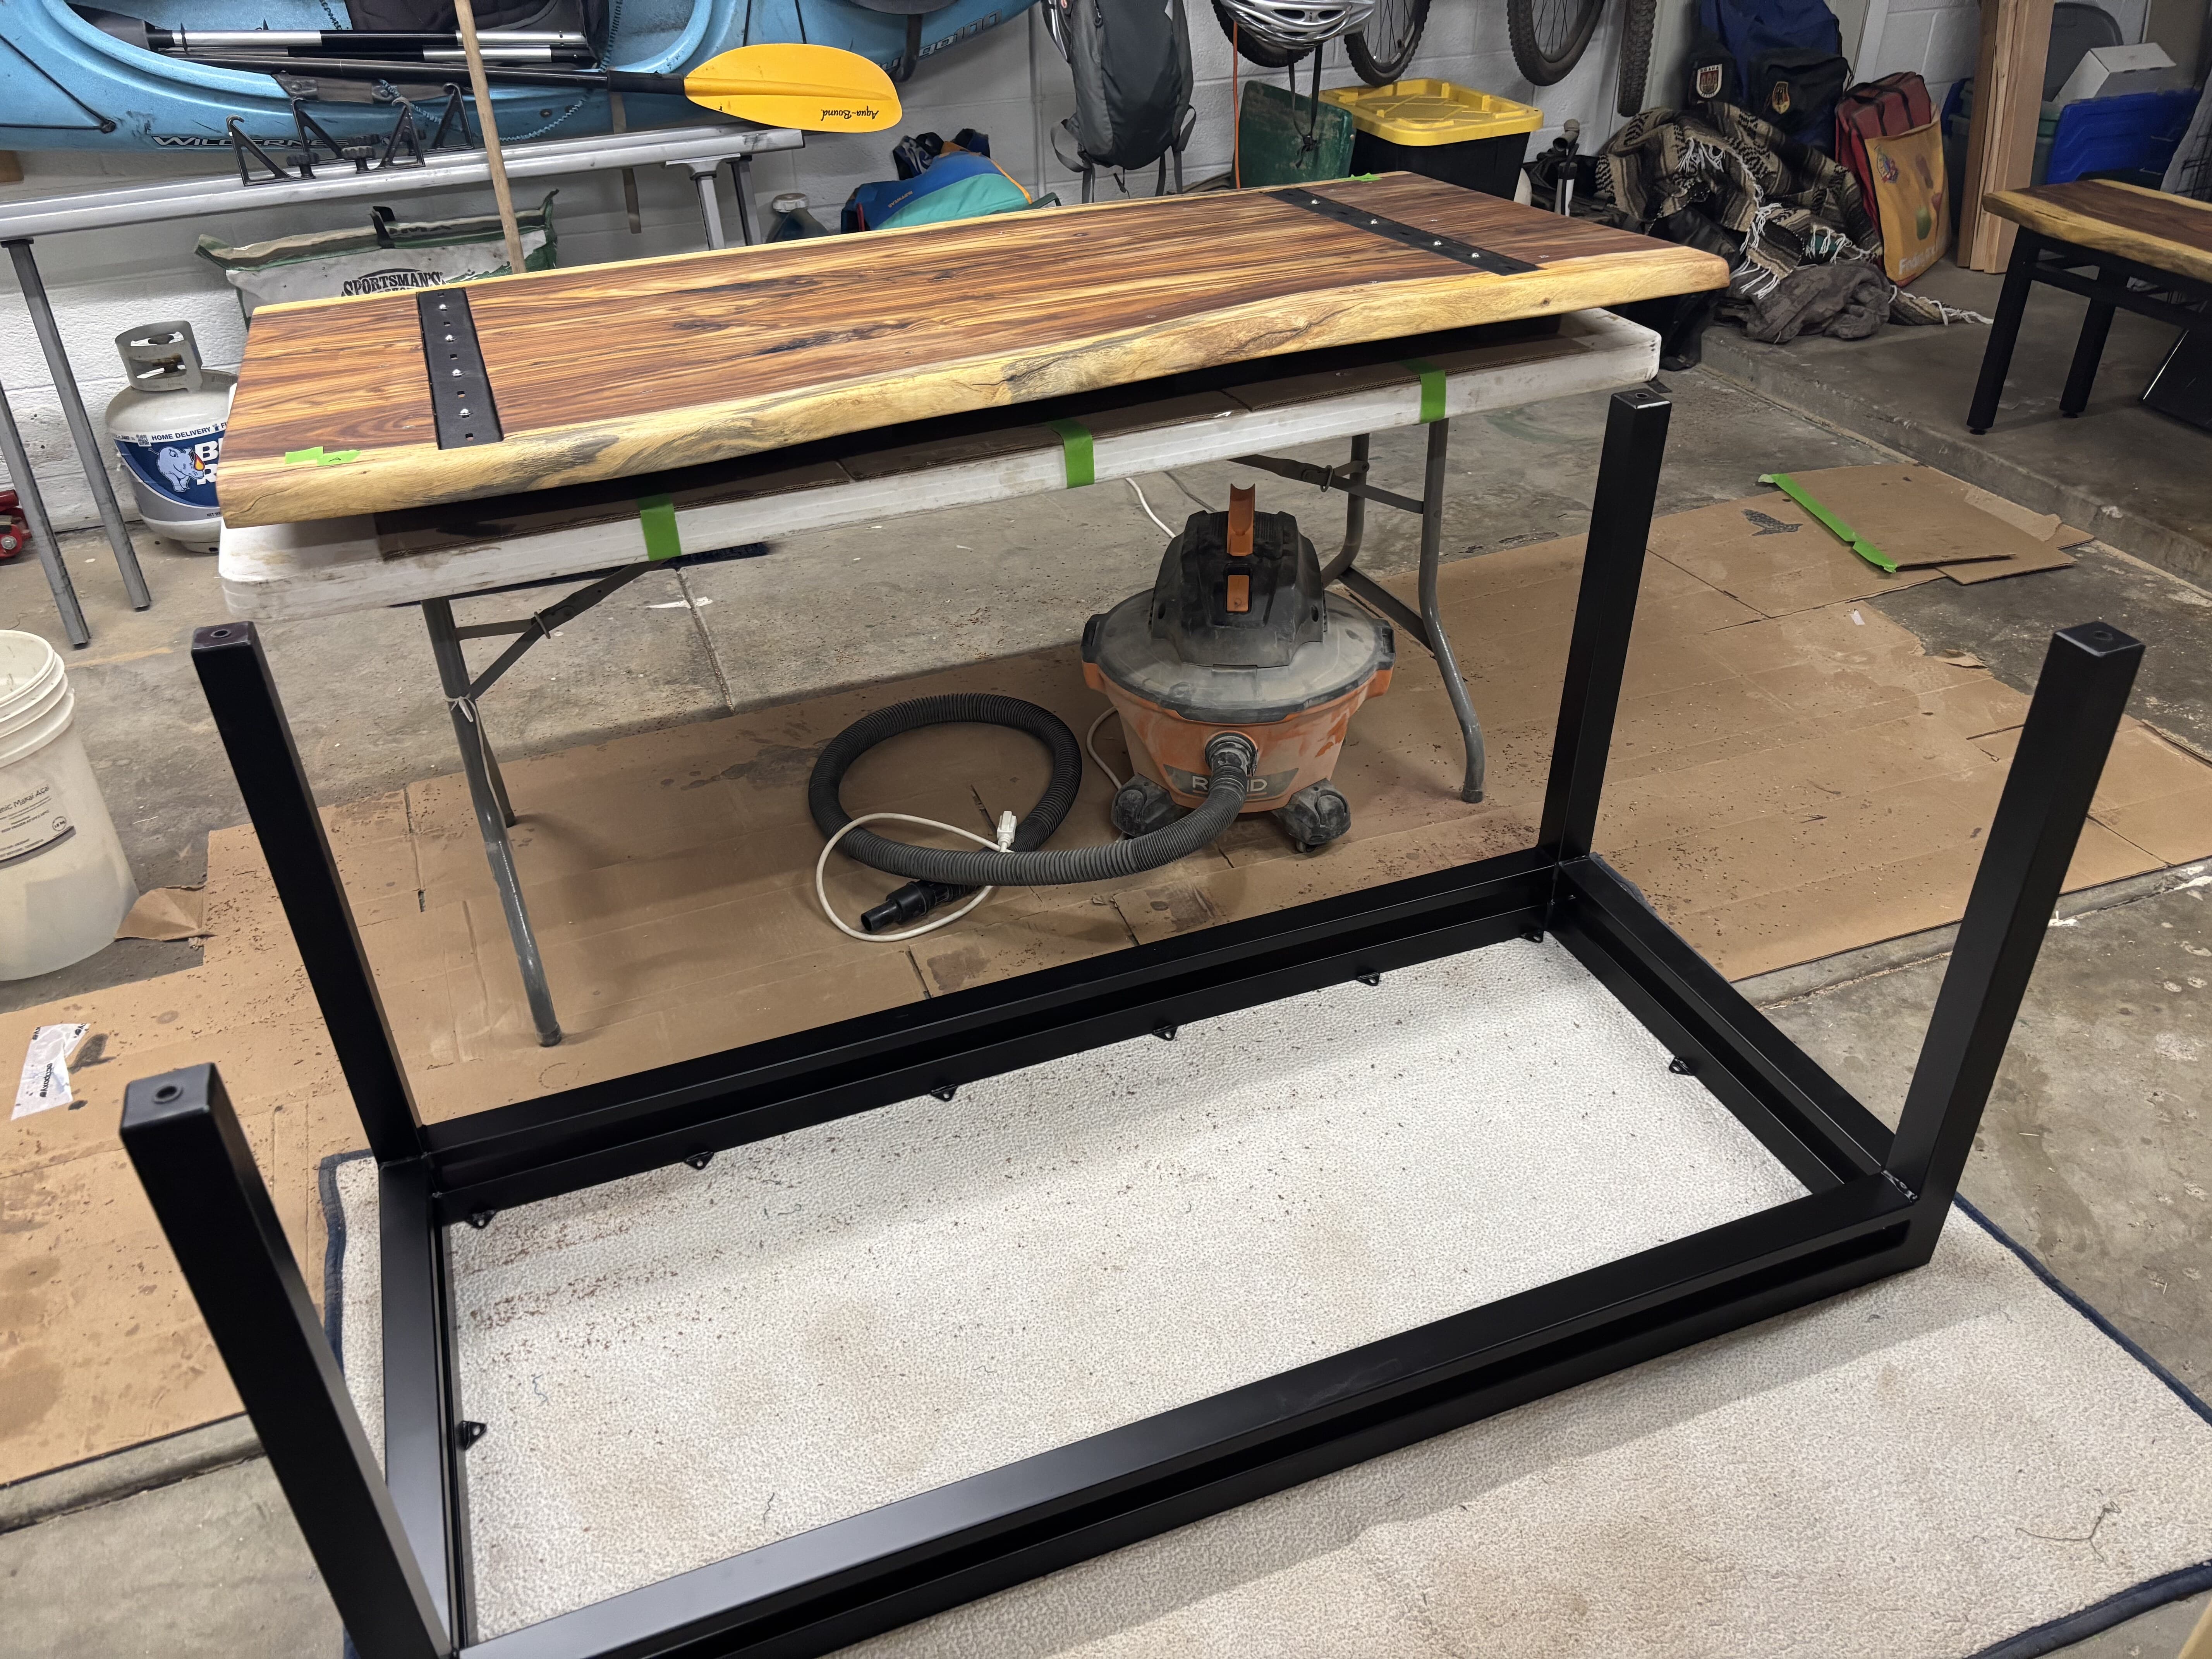
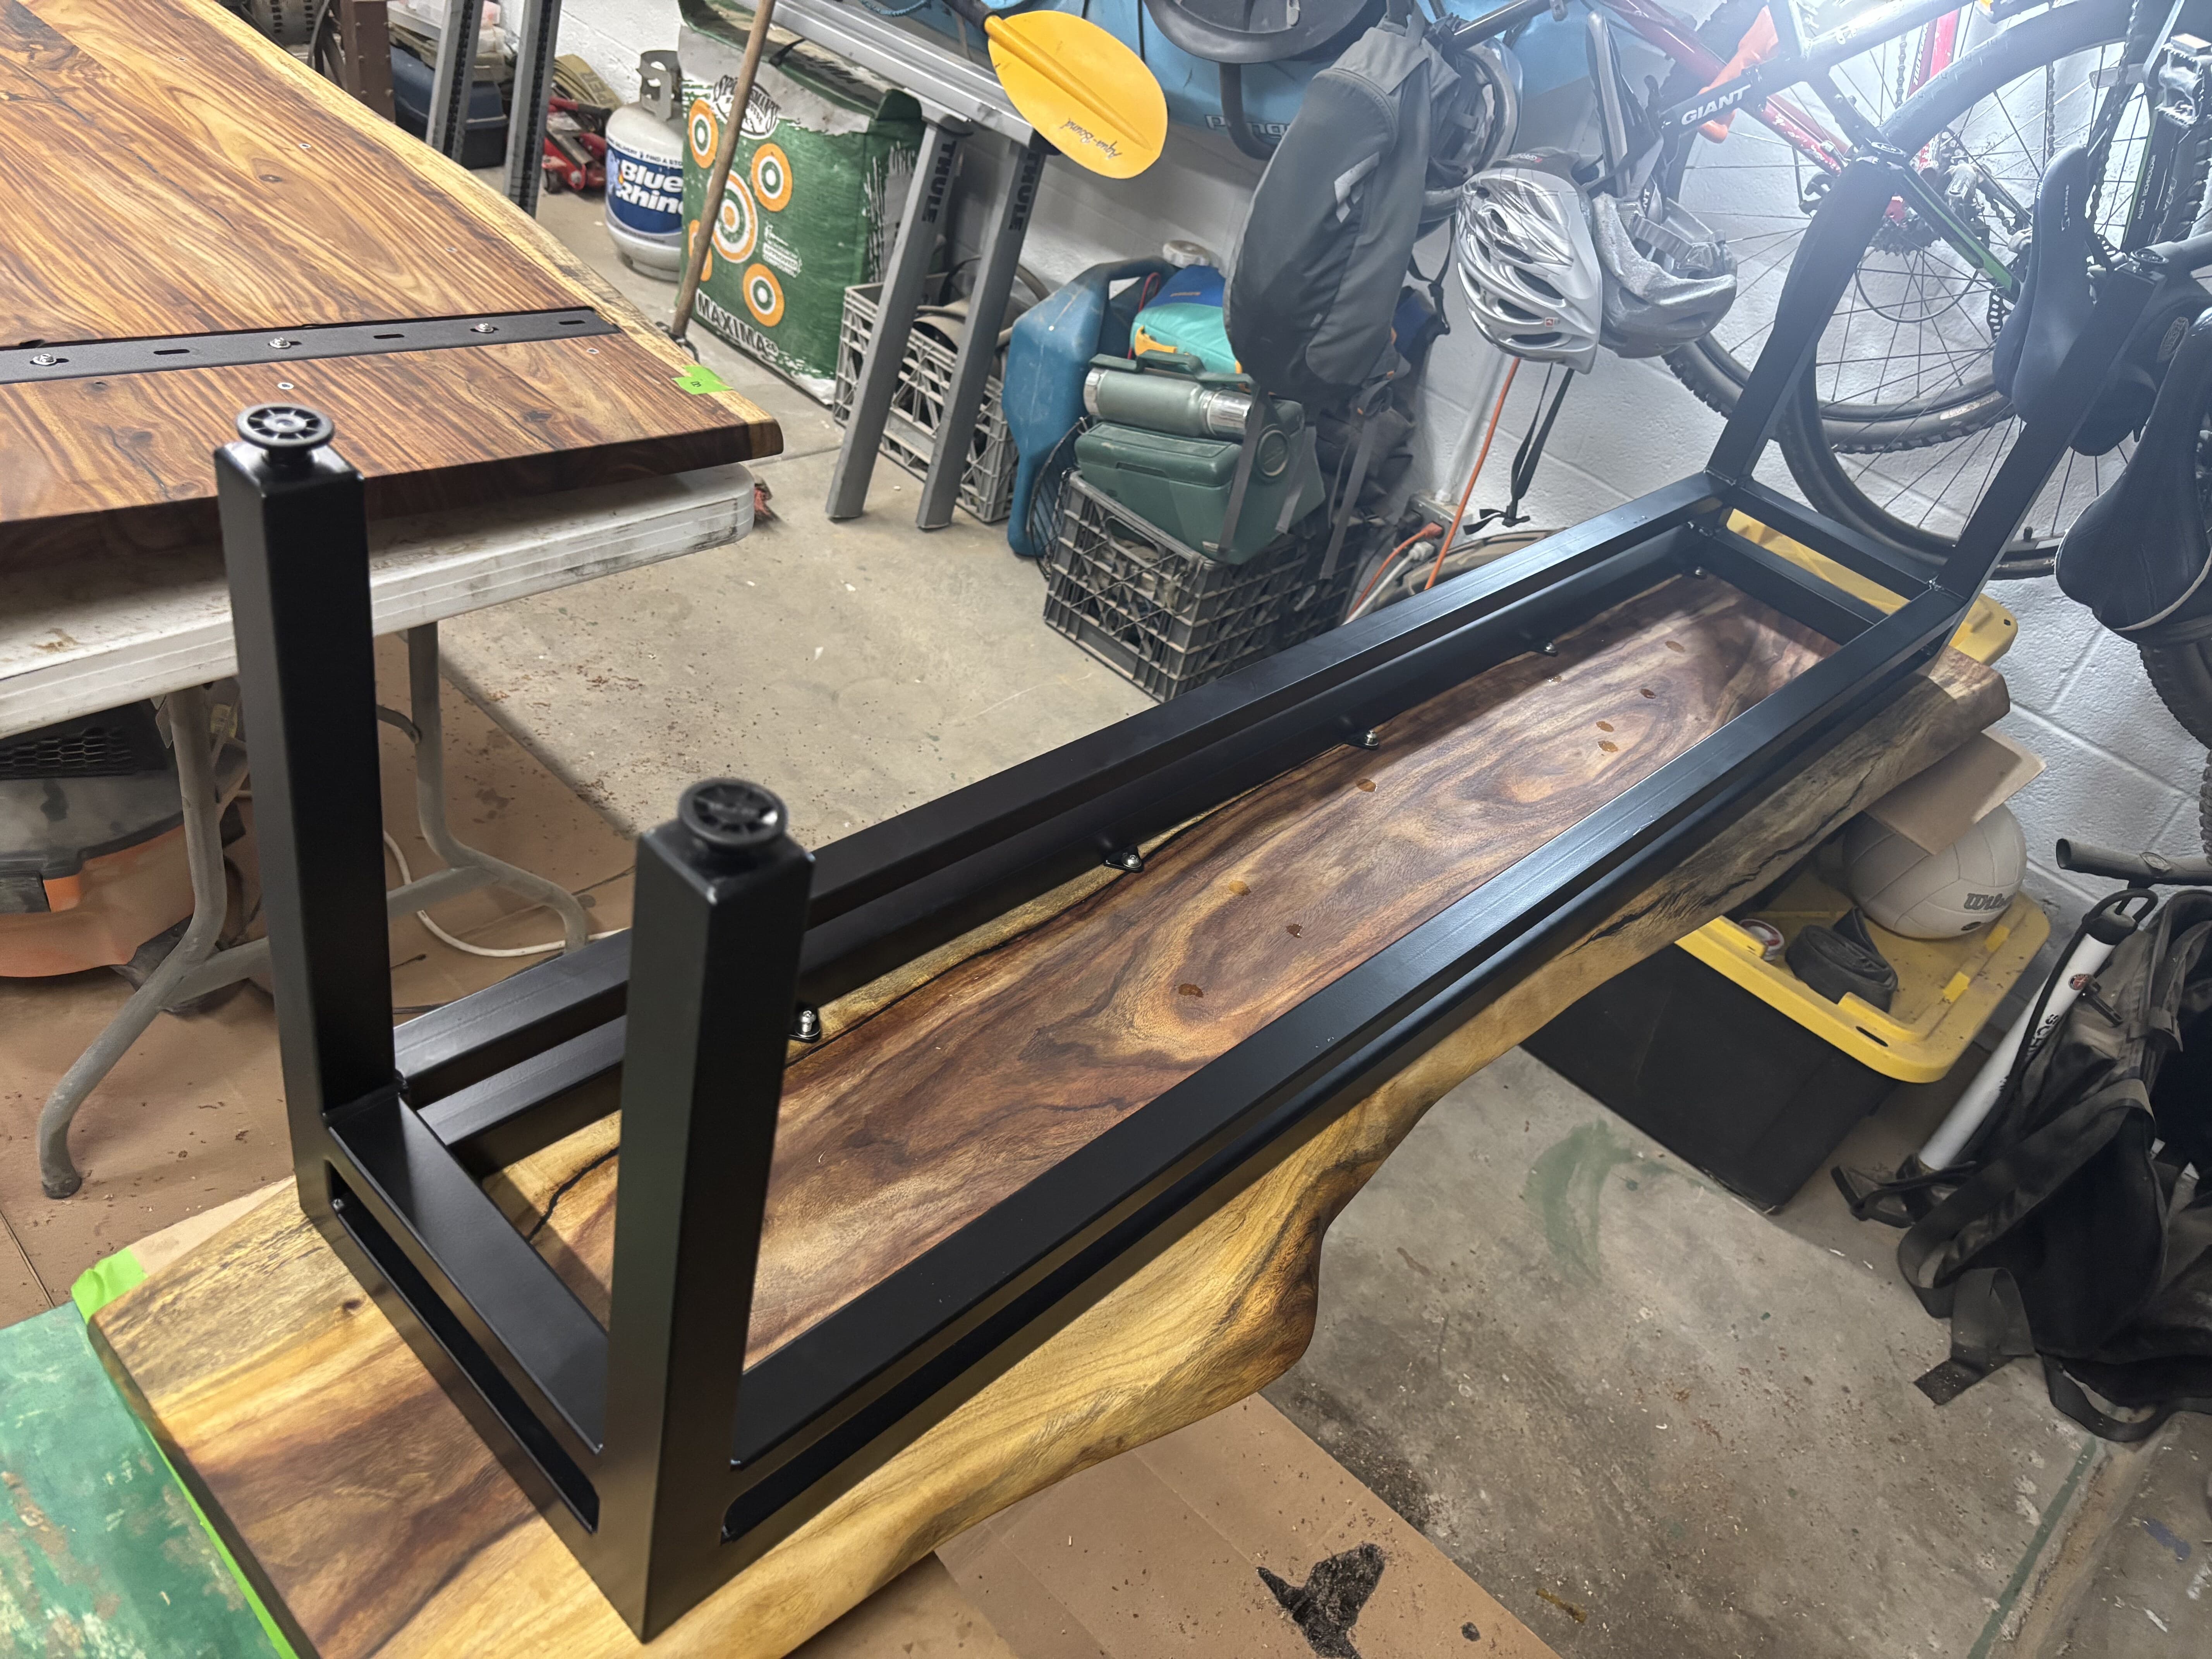
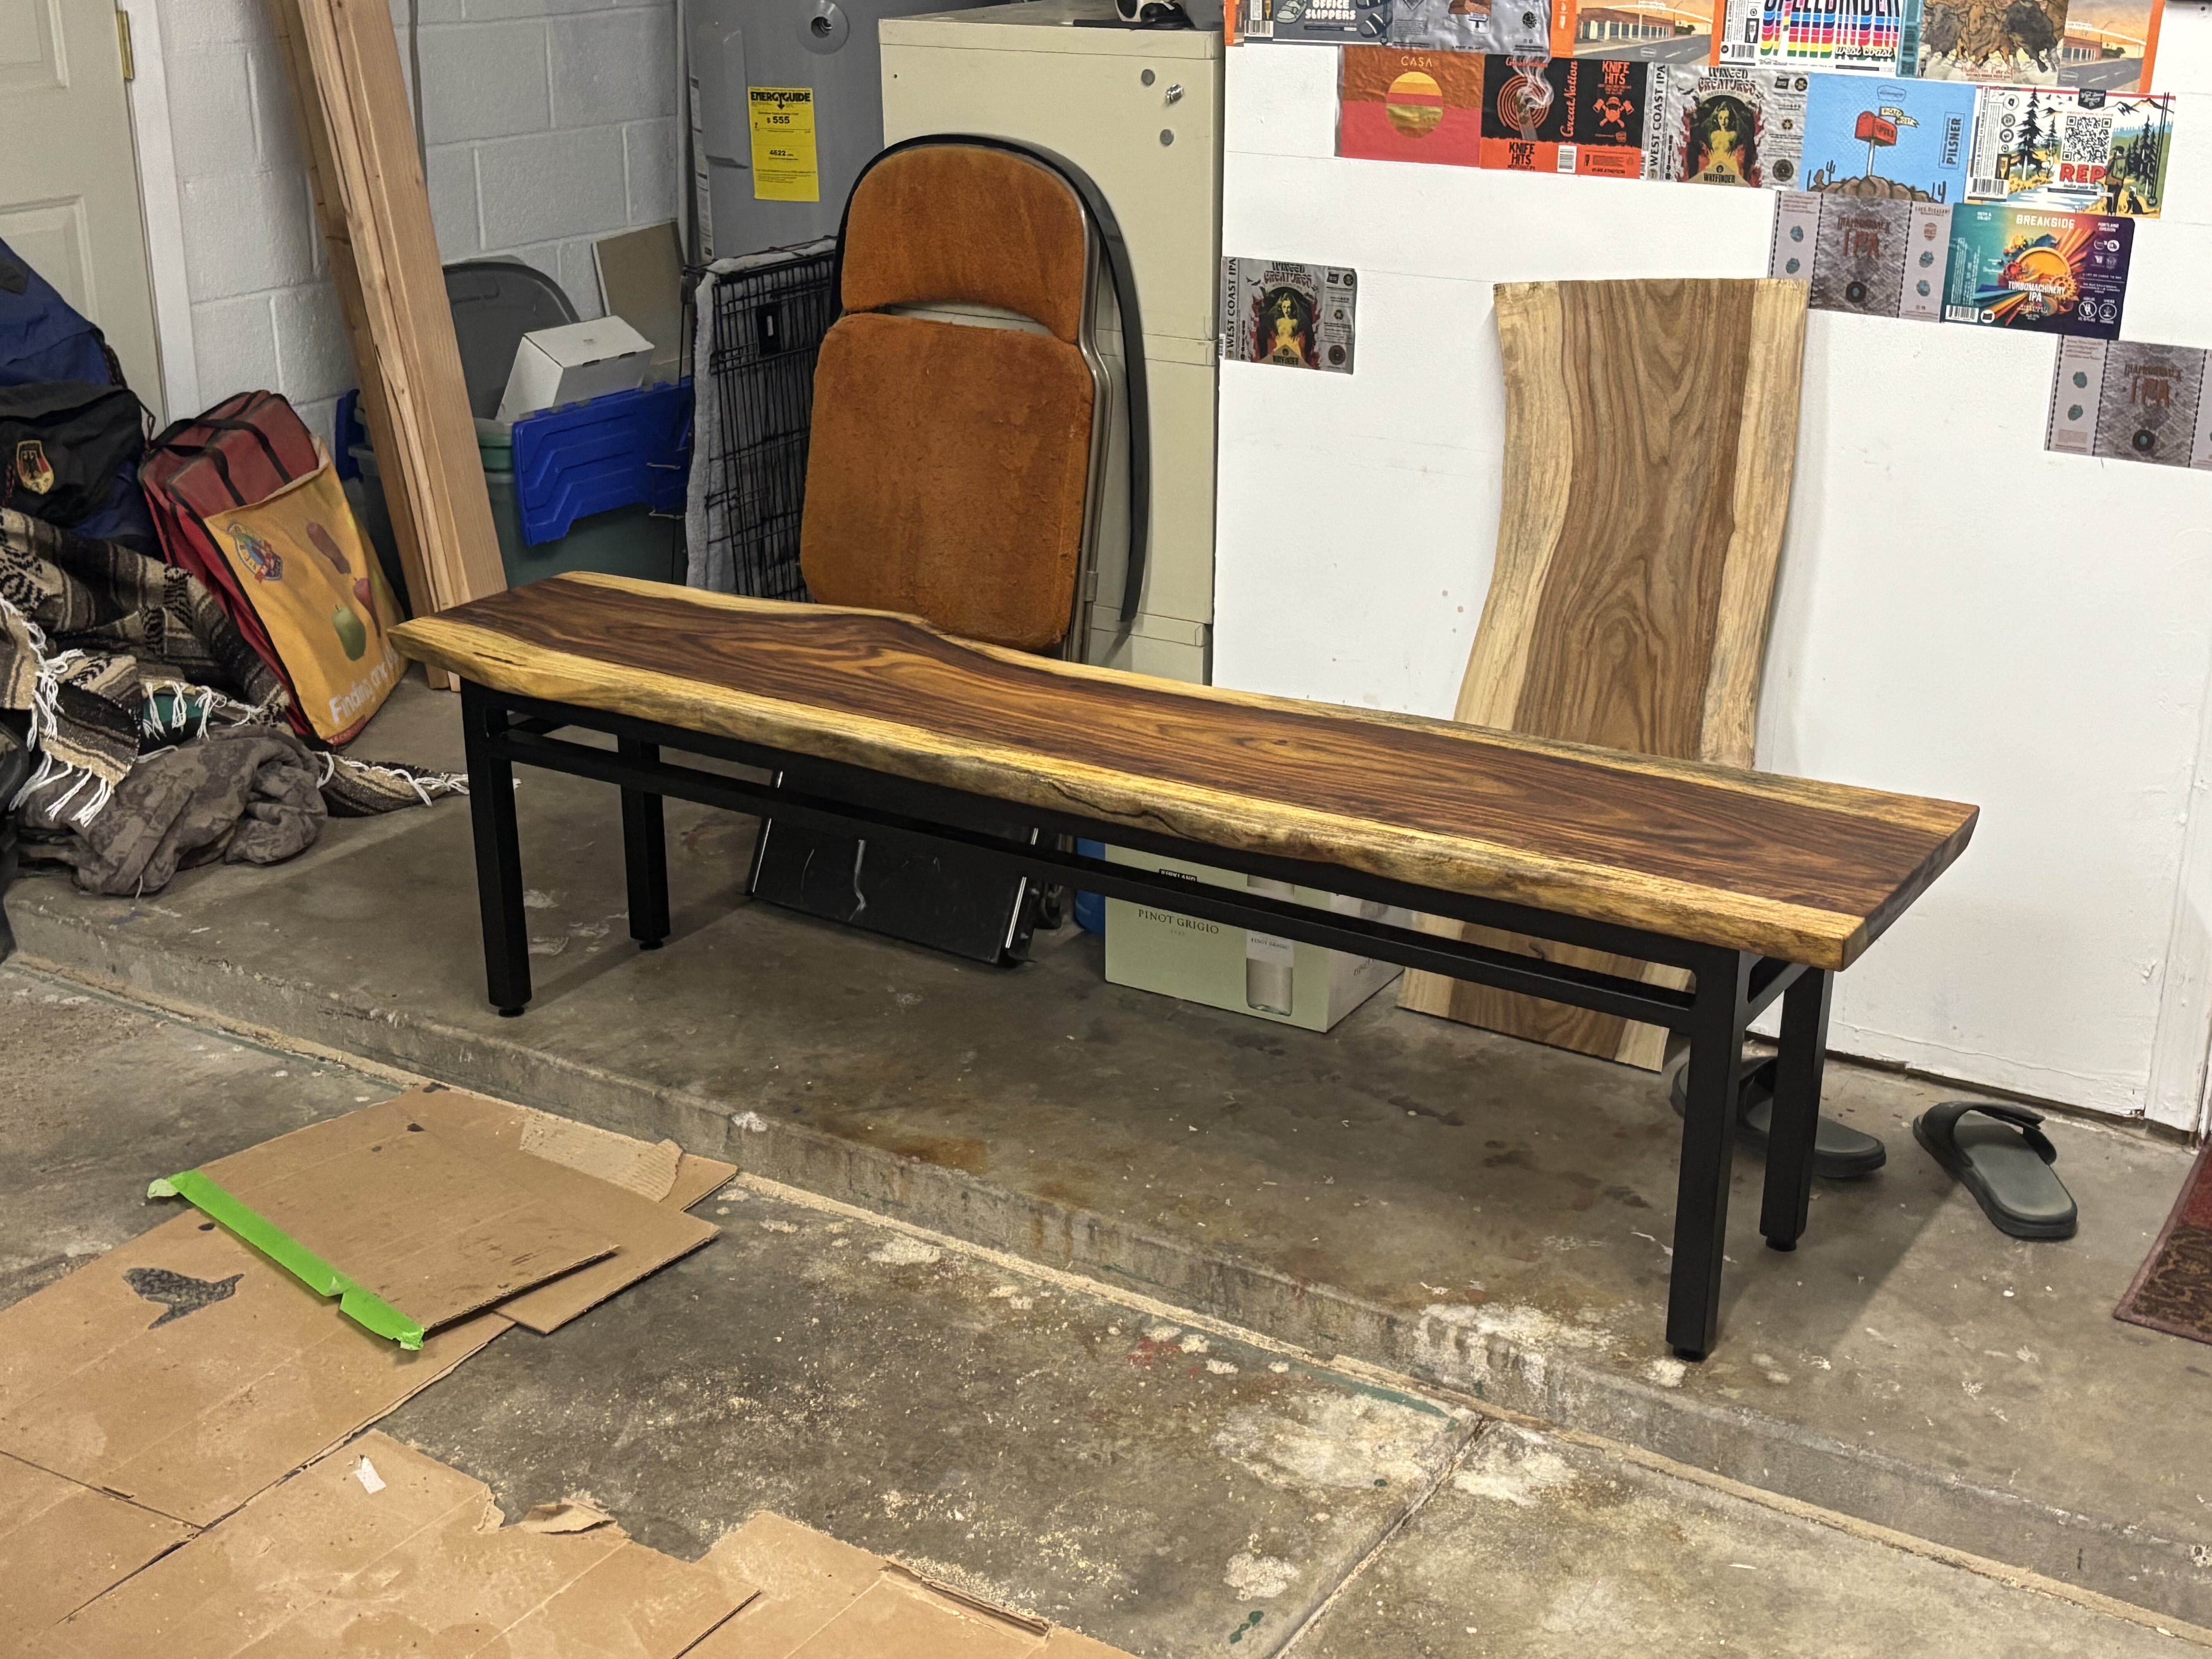
Design intent
Simple rectangular steel frame construction, powder-coated matte black. The look is clean and modern — a strong visual match for Arizona Rosewood and the black epoxy accents. The table base uses 2×2 and 1×2 tubing.
The matching bench — built alongside
The bench you see in the finished photos wasn't an afterthought — it was built at the same time, the same way, in the same style as the table, from the same tree. The only real difference is the steel: the bench rides on lighter 1.5×1.5 and 1×1.5 tubing, scaled down to suit its size. Everywhere the process was identical, what you read here applies to both pieces.
Leg spacing & overhang
The usual advice is to set the legs in from the ends for end-seat and knee room. I went the other way: I ran the base legs out almost all the way to the corners. On a 71" top that opened up the seating — three people fit comfortably along each long side and one at each end, for six-to-eight without anyone straddling a leg. And because the footprint is nearly as wide as the top, there's been no tipping, even with someone leaning on an end. If you want maximum seating and a rock-solid stance, pushing the legs toward the corners is worth considering — just confirm knee and chair clearance at each position first.
Mounting to the slab
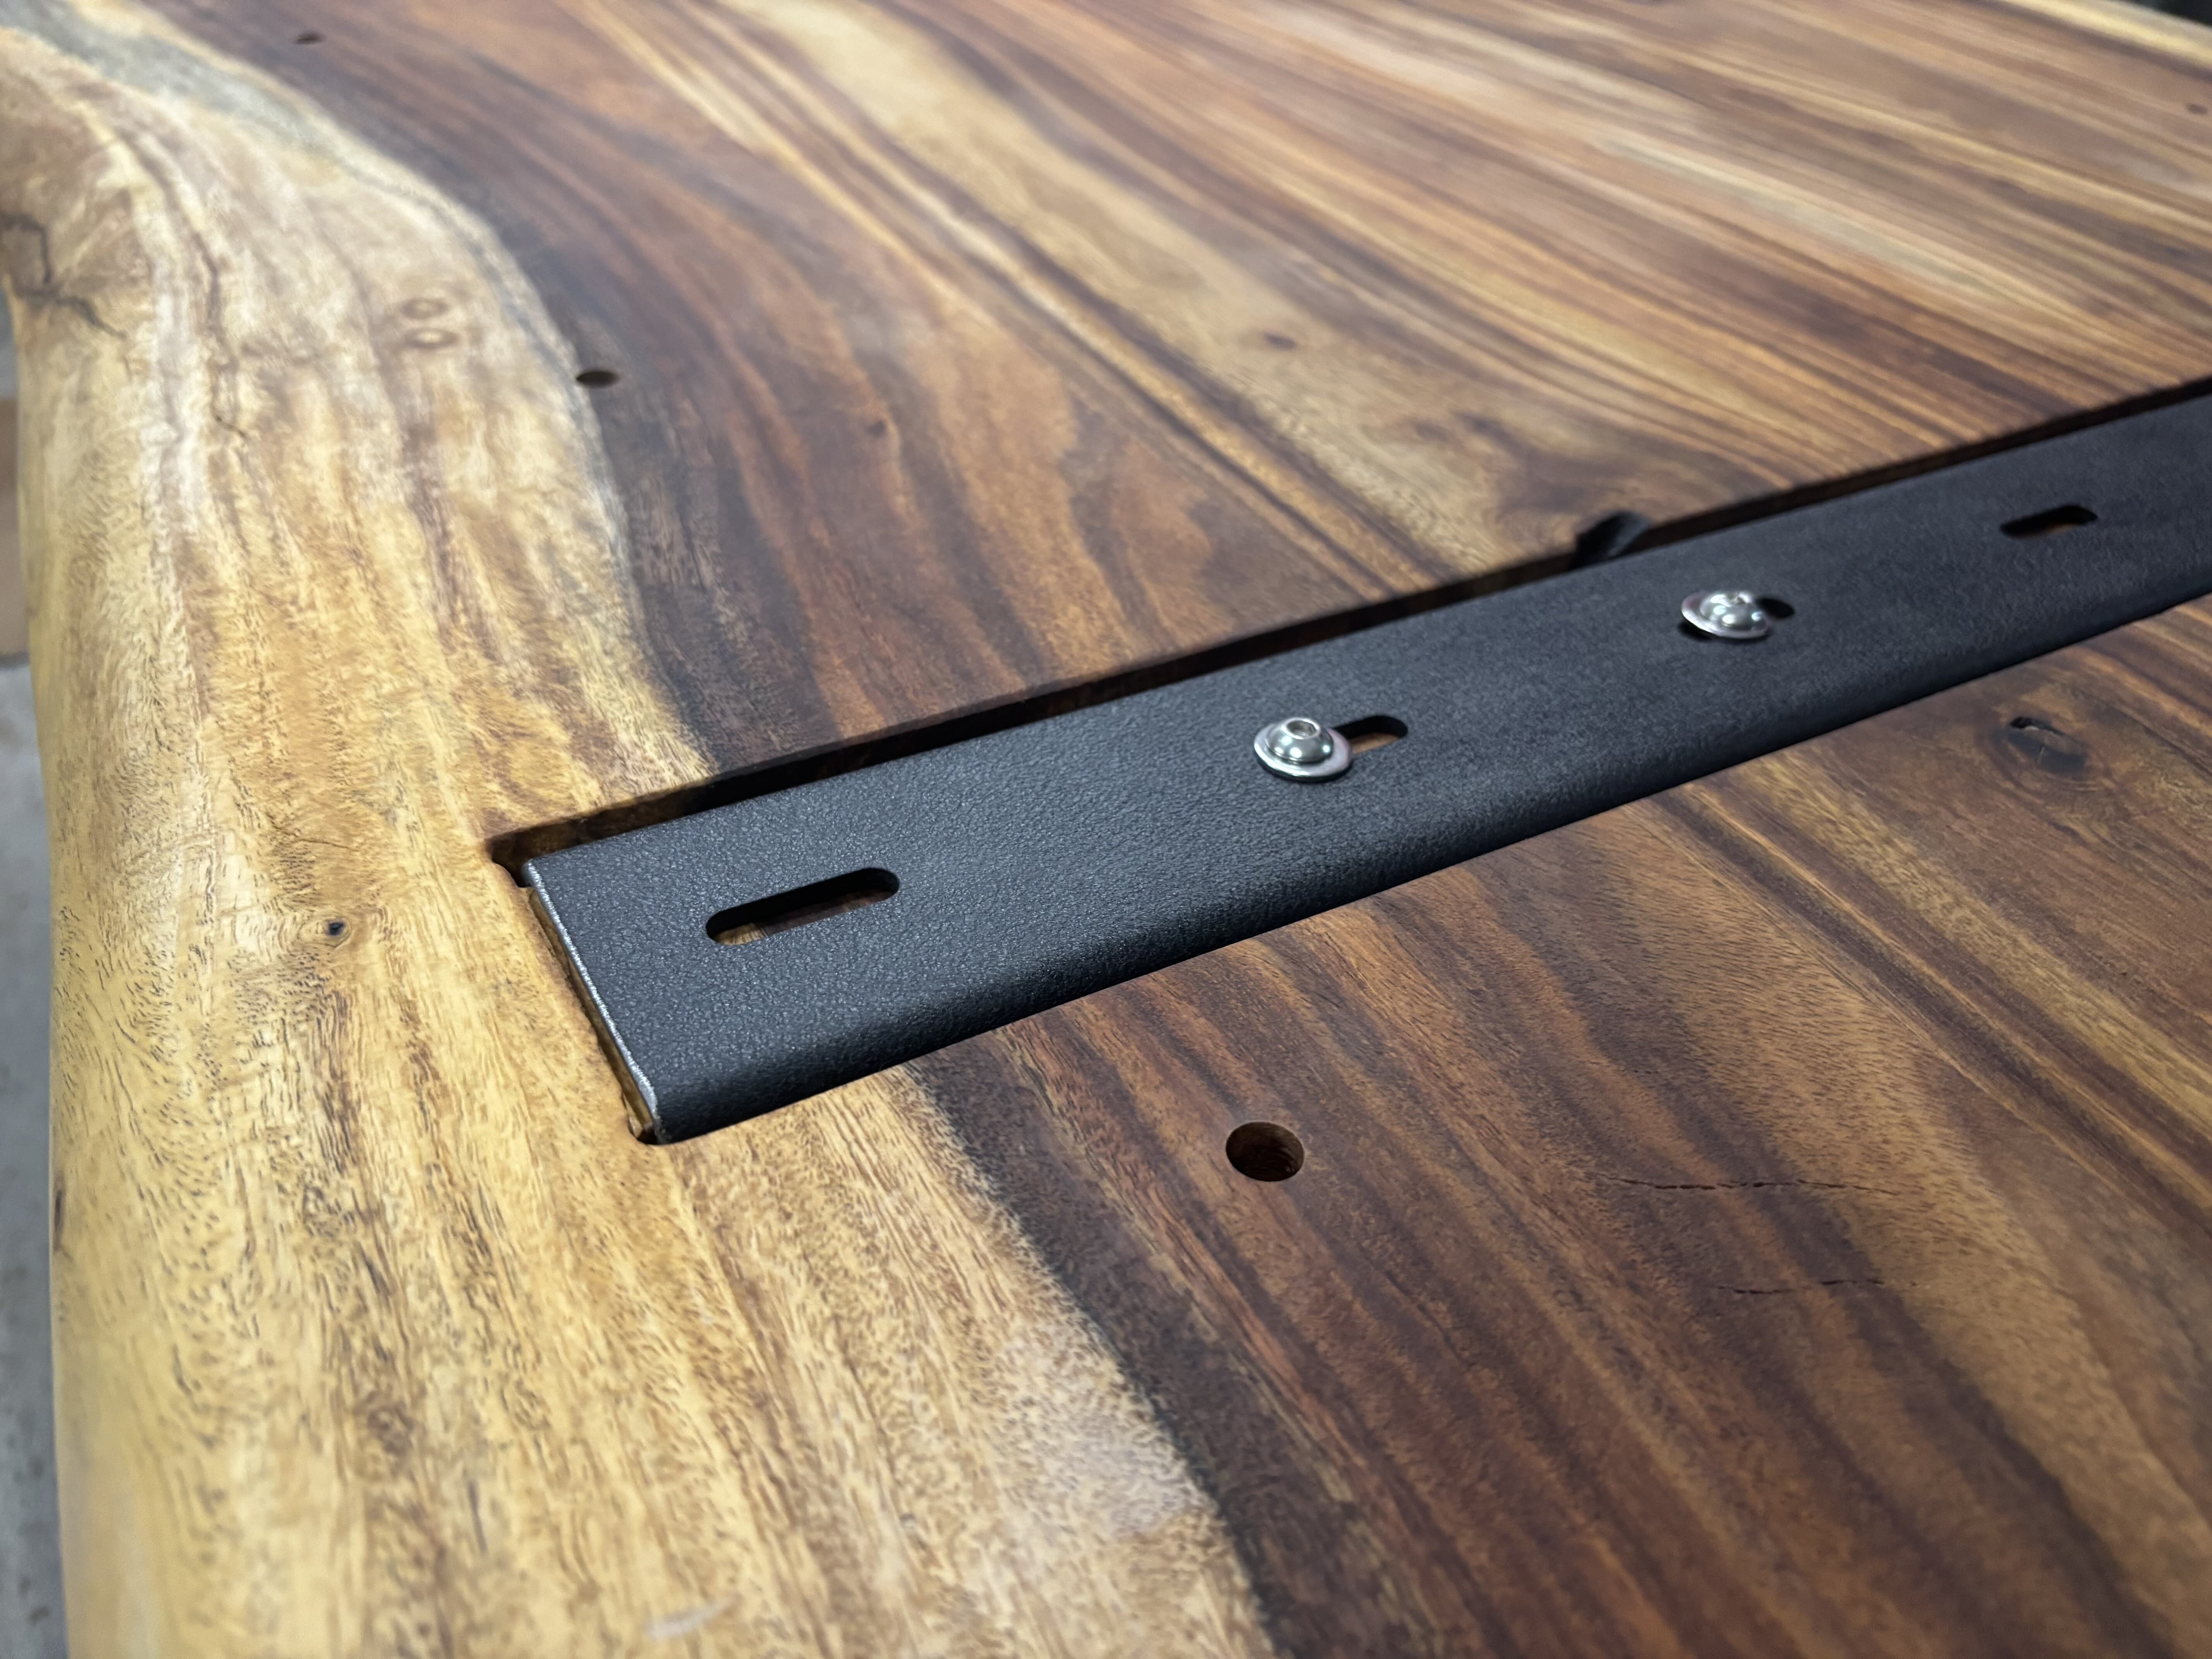
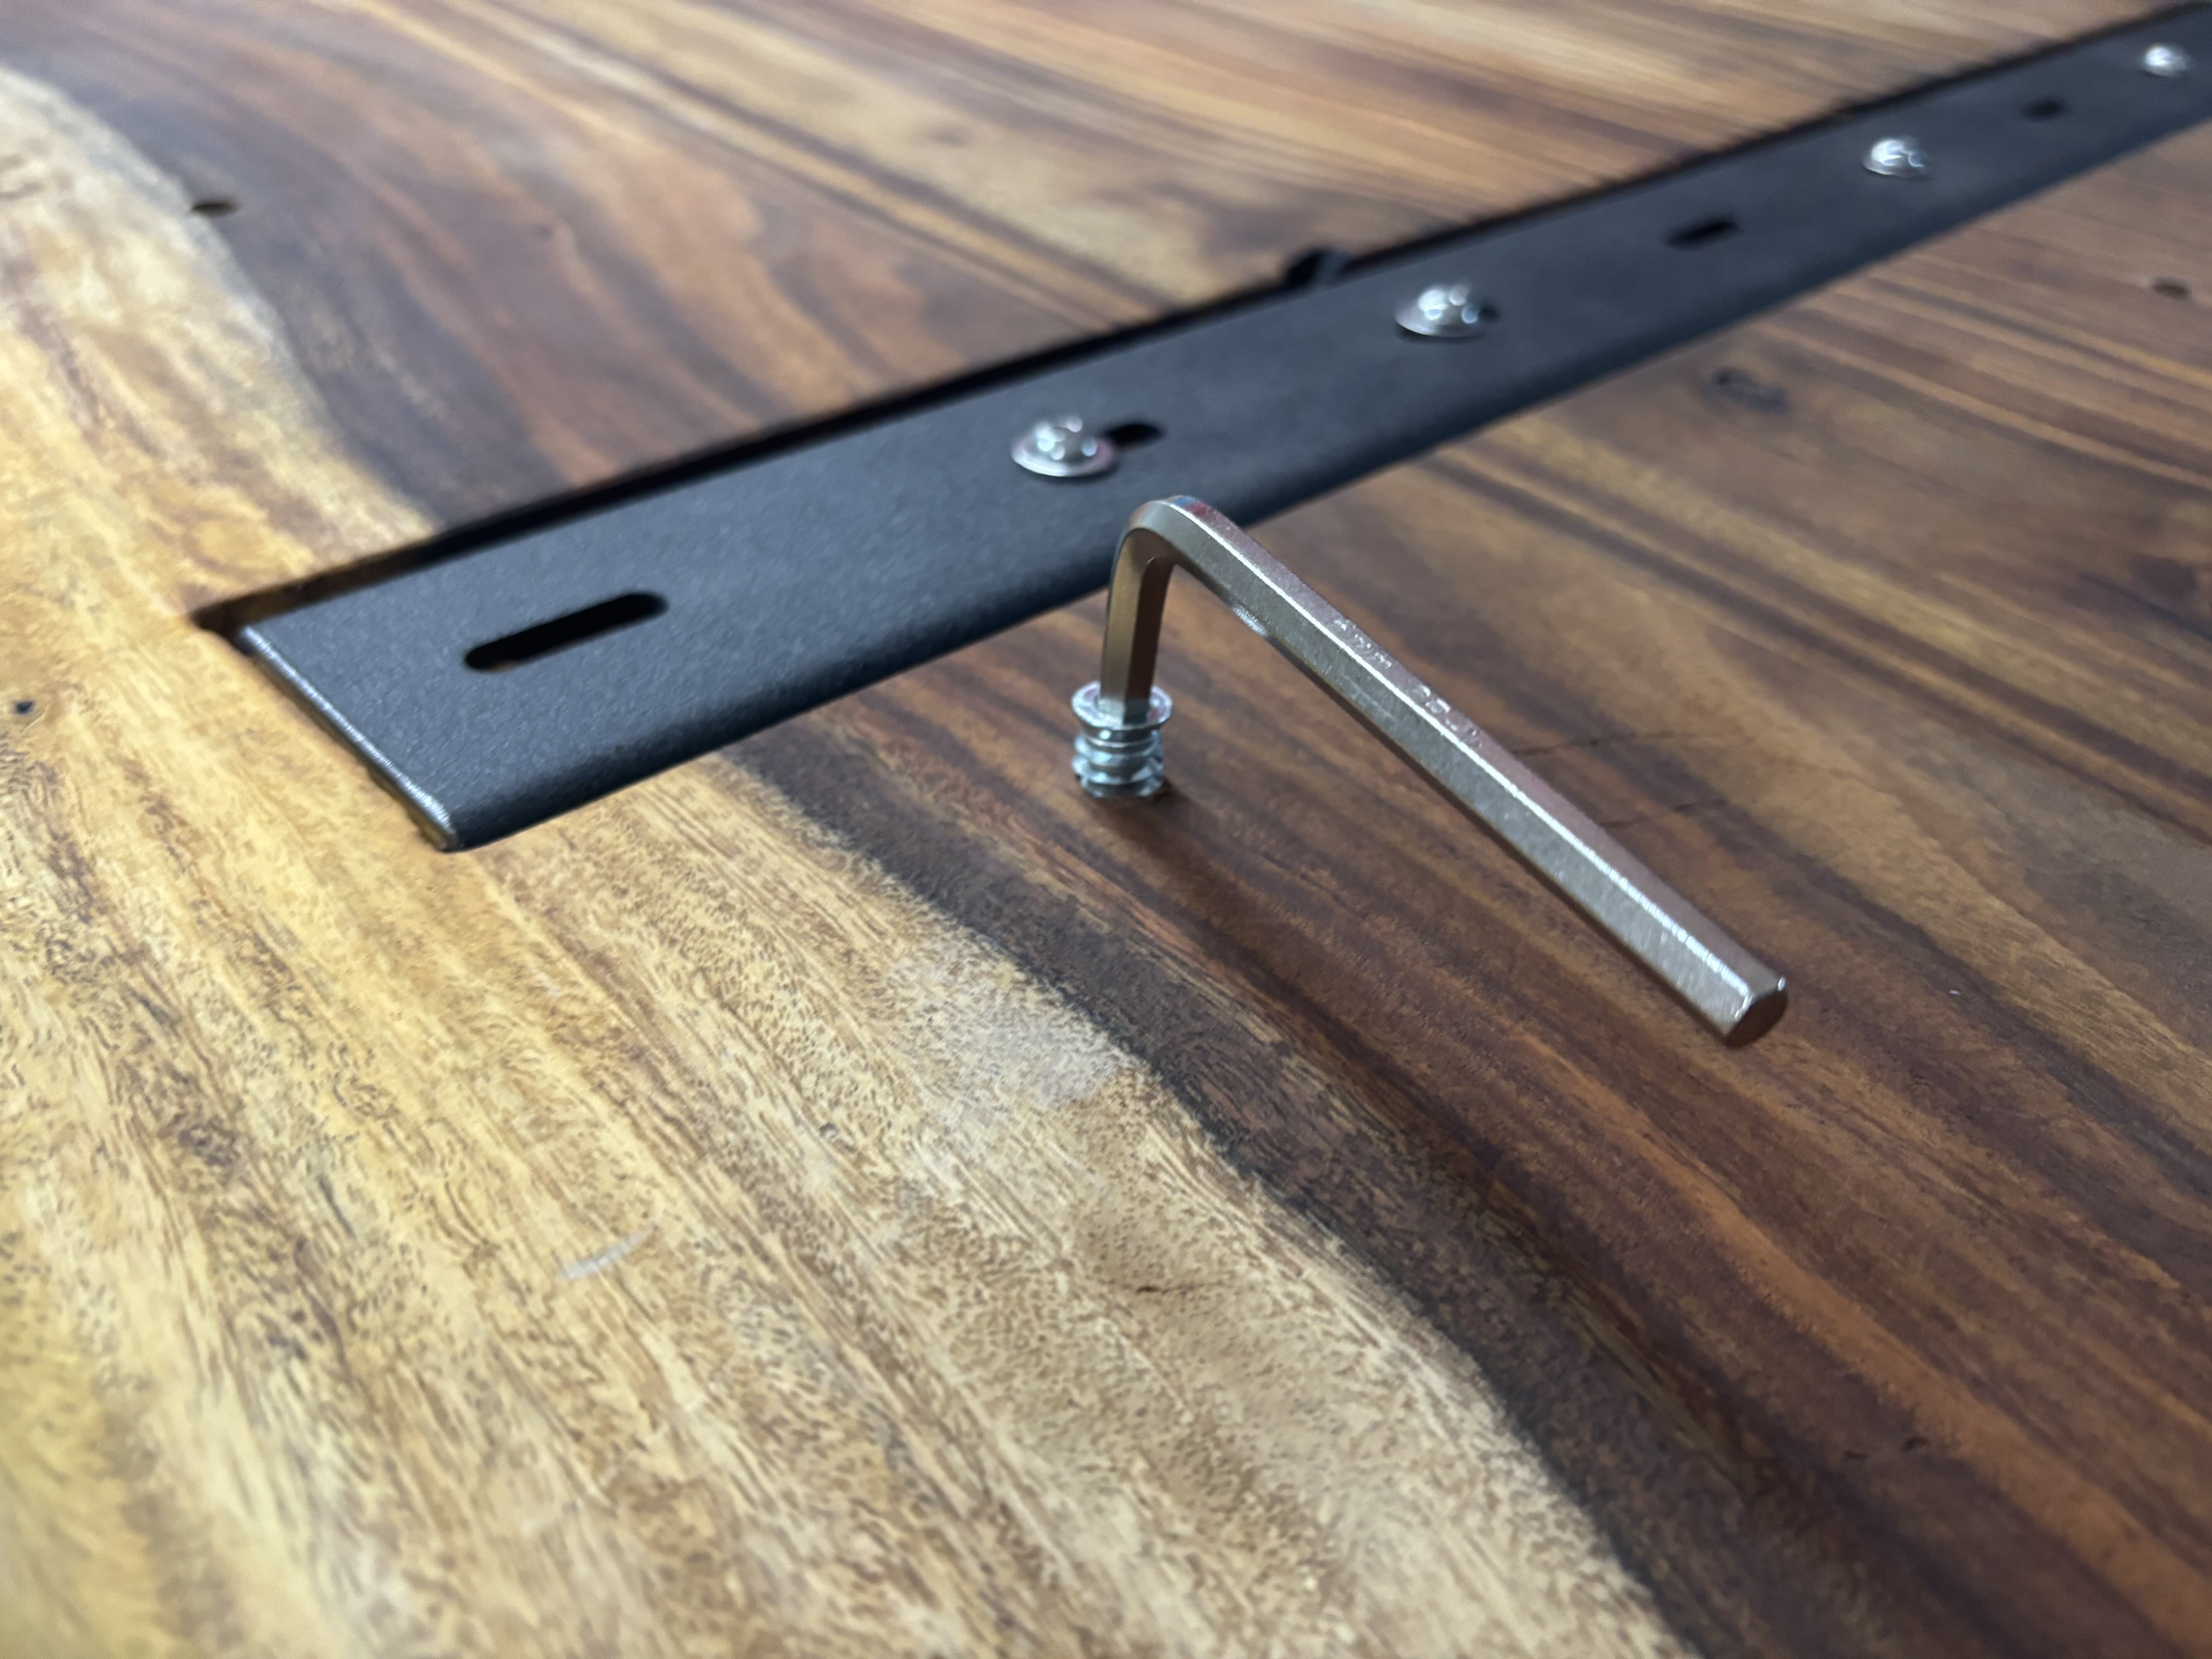
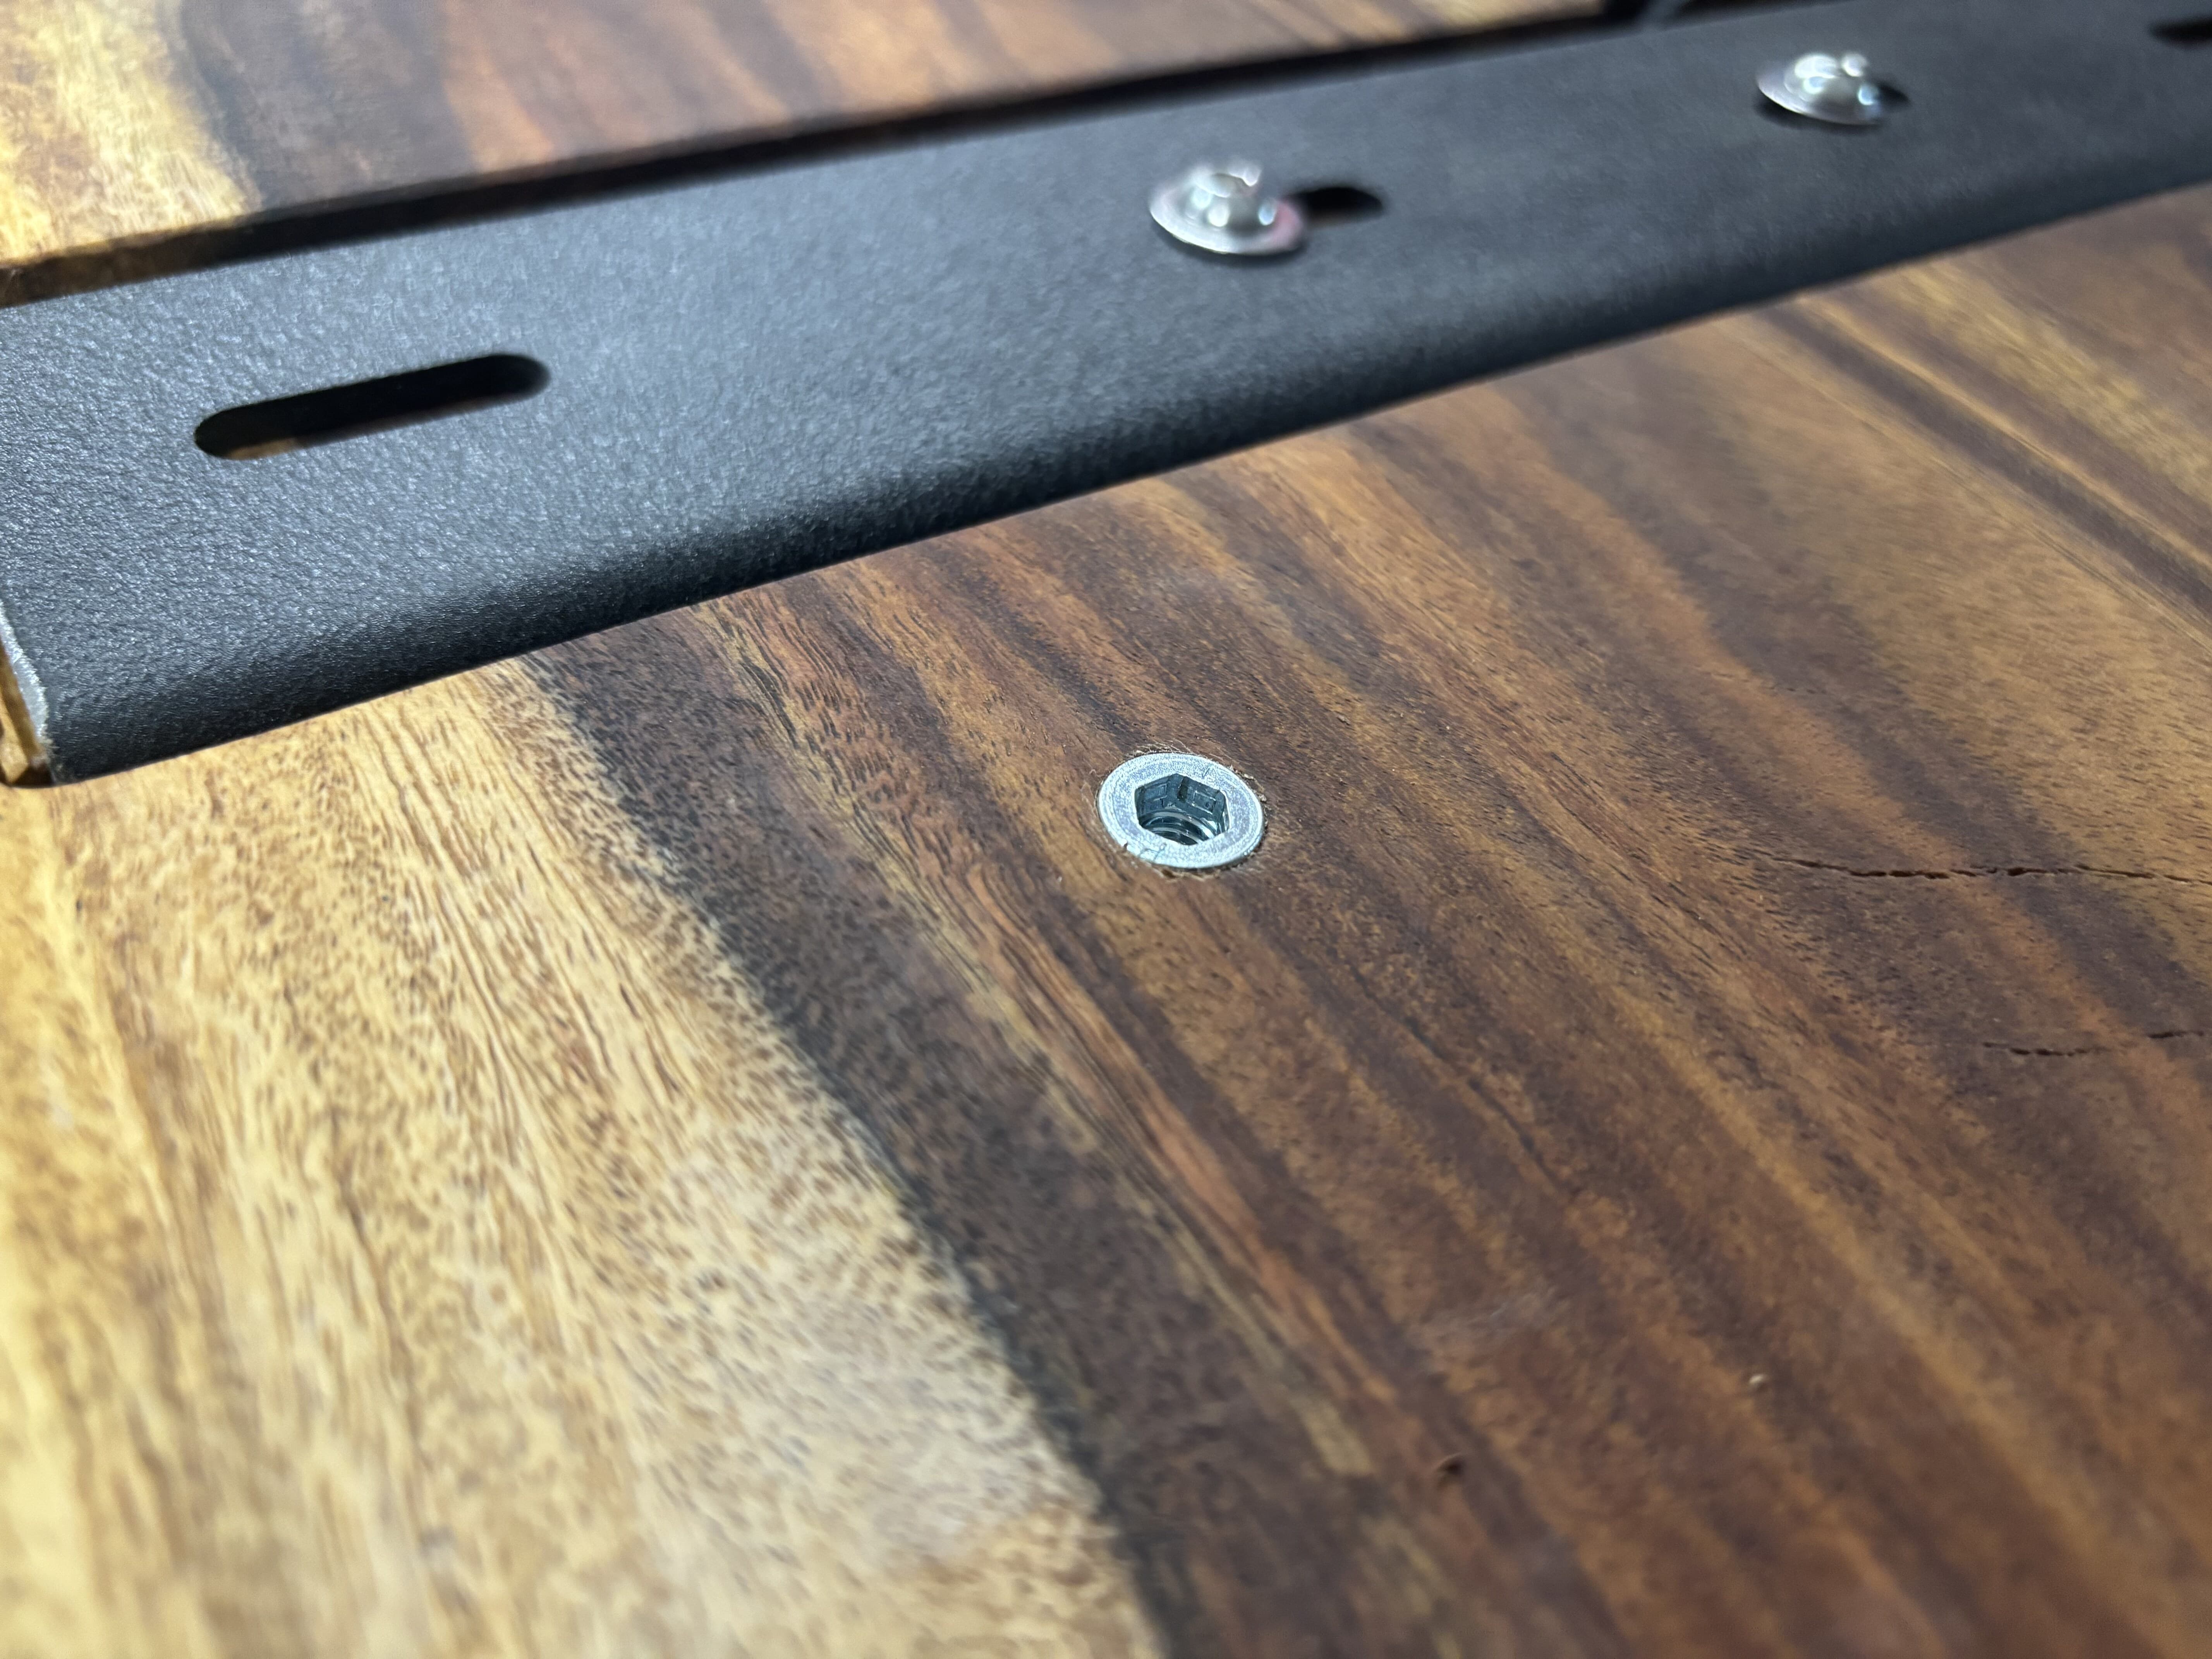
The base bolts to the underside through mounting tabs/plates. As with the C-channels, the slab still needs to move: the right way is slotted or oversized holes on the cross members, so the top can expand and contract without splitting. Pre-drill carefully and don't over-penetrate the slab thickness.
⚠ Mistakes & Fixes — I didn't slot the base mounts
Full honesty: on this build the base mounting holes weren't slotted. The advice above is correct — I just didn't think of it at the time. So far there have been no cracks or problems, but it's a real gamble on a wide solid-wood top that wants to move seasonally.
Fix / next time: slot the base mounts the same way as the C-channels — fixed near the center, floating in slots toward the edges. It costs nothing at the drill press and removes the risk entirely. On my next table, this is non-negotiable.
⚓ Note — Everything comes back off before finishing
The base, legs, and C-channels are only test-fit here. Once the holes are drilled and everything is confirmed to fit, it all comes back off — the slab gets sanded and finished bare, and the hardware is reinstalled at final assembly (Step 15). Don't finish around mounted steel.
Leveling feet & floor protection
Adjustable leveling feet handle uneven floors and protect both the floor and the finish. Confirm seating clearance once mounted — make sure chairs and knees clear the frame.
🛠 Tips
- Confirm seating clearance before finalizing leg position.
- Avoid placing legs where knees hit.
- Pre-drill carefully and use slotted holes for movement.
- Matte black pairs beautifully with rosewood and black epoxy.